
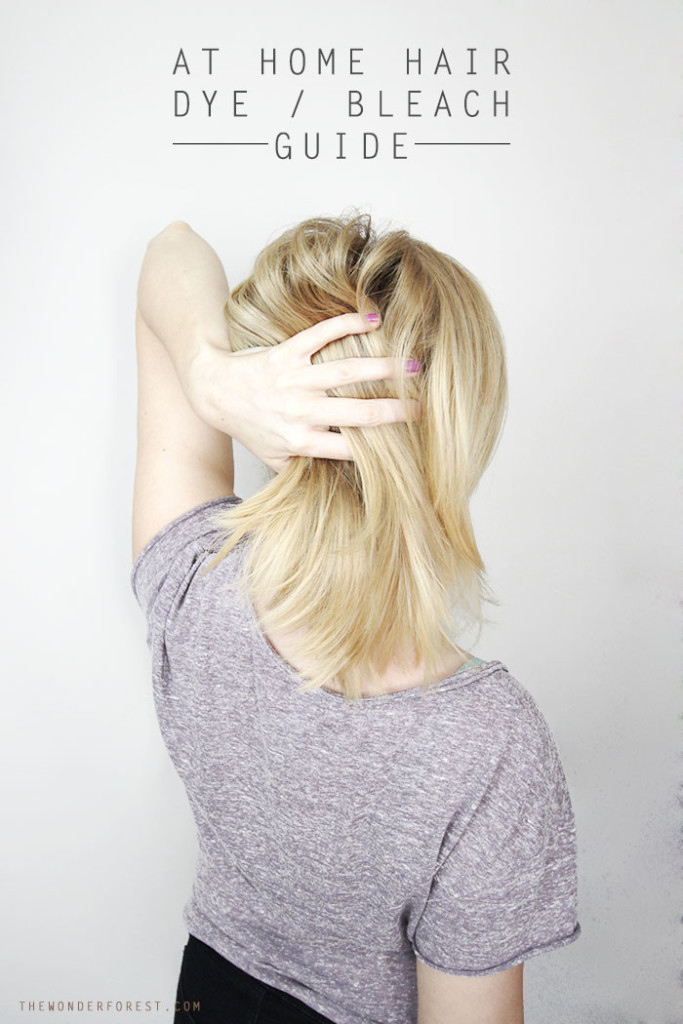
Looking to bleach your hair at home? Lightening or bleaching your hair at home takes some practice and patience but the results could be just what you were hoping for, without going to a salon.
In this complete guide to bleaching your hair from the comfort of your home, I’ll cover all of the important things you MUST know before diving in.
Did you know that the texture of your hair matters? How about the current shade or whether or not you’ve already dyed your hair with boxed dyes? Are you going to blonde or super light silver hair?
Keep reading to discover what I spent years perfecting! I hope this post is educational enough for you to feel comfortable tackling platinum blonde hair yourself.
The story begins like this. When I was thirteen years old, I thought it would be a good idea to try bleaching my hair at home.
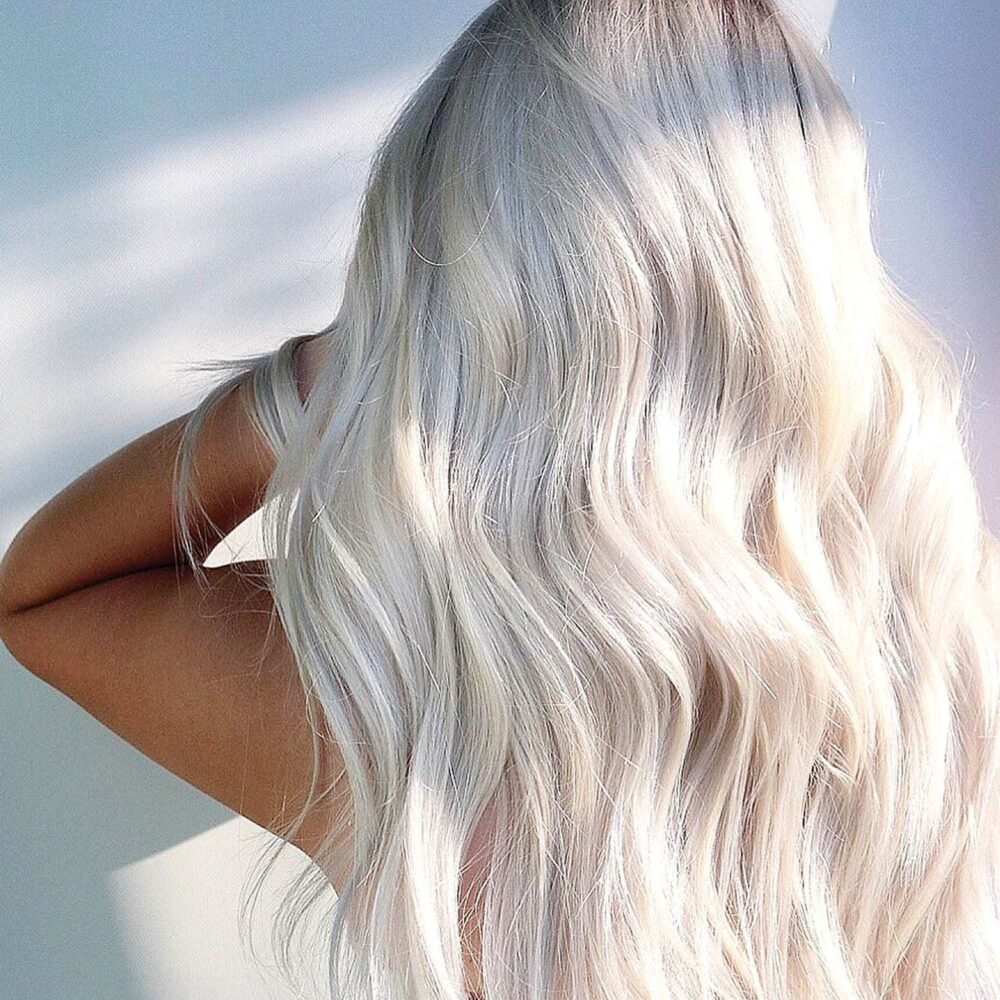
I wanted the whitest platinum blonde colour and had watched my brother bleach his hair countless times, so I thought everything would be fine.
With my box of Blondissima in hand, I expected the “super blonde” I saw on the box. Instead, what resulted was a head full of bright yellow hair and a trip to the salon the next day with my mom. (Tip: don’t ever buy Blondissima).
Enter: the beginning of my hair dyeing journey.
I had my hair professionally dyed from then on all the way up until my 20’s. After a while, I started doing it myself to save time and money.
I even ventured into dyeing my hair silver.
With mistakes made and successes reached, I thought I might be able to offer some tips for dyeing your hair at home.
Note that I am not a professional and cannot guarantee any exact results should you try this at home.
Everyone’s hair is different. Some has been professionally dyed, some dyed with boxed products. Some with naturally different pigments and different shades to start with.
Before I do anything like this to myself, I do countless hours of research. So this post is sort of a collection of that research put together into one little guide. Here is what I’ve learned:
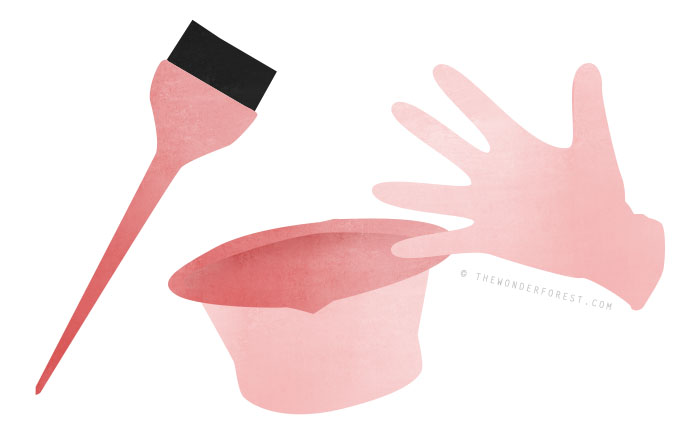
Stock up on the proper tools
The proper tools make a world of difference and ensure that the product is applied correctly.
You would never go to a salon and see somebody squeezing a bottle of hair dye all over your head, would you?
To get an even coverage, you’ll want to use a tint brush, a pair of latex gloves, and a brush bowl. Or, you can just get a complete kit like this one.
Ditch the drugstore box dye and bleach
There is no “one size fits all” when it comes to hair dye.
Permanent drugstore dyes do their best to cater to everybody, which usually means adding a stronger than necessary developer to the kit to ensure that it at least does something to your hair.
The major drawback though is that you can’t customize it to suit the needs of your own hair and take into account your hair porosity.
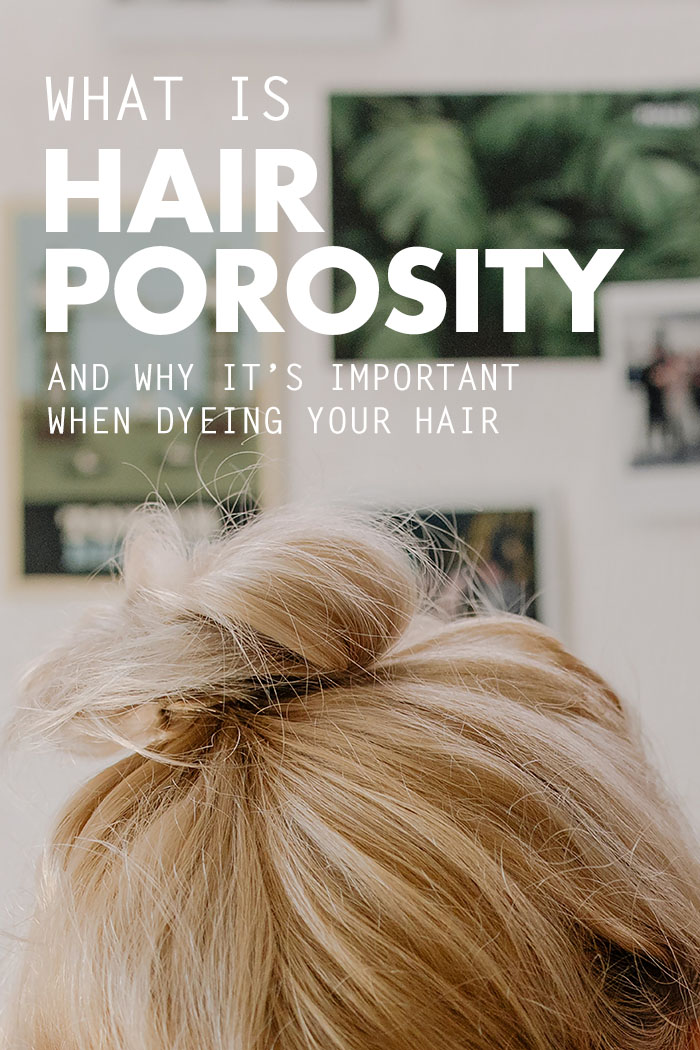
What is hair porosity?
Hair porosity determines how well your hair can absorb colour or moisture. This can help you decide which products to use and how long to process your hair for — This is important!!!
Low/Compact Porosity – Your hair cuticles are closed and don’t allow for colour to be easily absorbed. Usually your hair takes a long time to dry.
Normal Porosity – Absorbs the right amount of moisture and colour. Your hair is shiny and healthy.
High/Raised Porosity – Your hair cuticles are open and can suck up moisture and colour quickly (but may not retain it). Your hair might be dry or damaged from previous dyeing jobs. Use more caution when colouring.
Hair Porosity Test
You can test the porosity of your hair by simply taking a few strands of your clean product-free hair and placing them in a bowl of room temperature water. Keep an eye on it for up to 5 minutes.
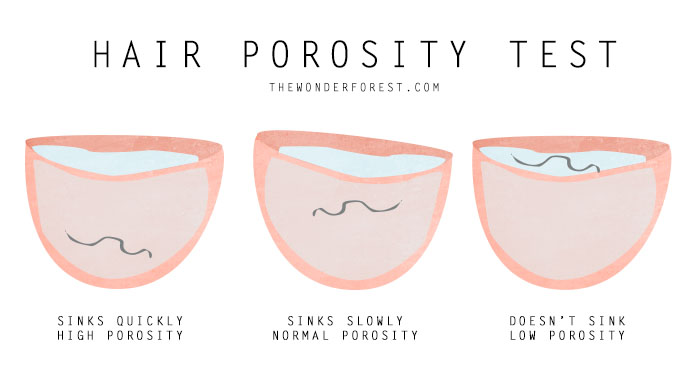
- If your hair sinks right away, your porosity is high as it absorbed all of the water quickly.
- If your hair doesn’t sink at all after 5 minutes, your porosity is low as it hasn’t absorbed the water.
- If your hair sinks slowly over the course of your experiment, your porosity is normal.
With this in mind, you can begin to see why a drugstore boxed colour might not turn out as shown on the box. It has no way of taking the condition or porosity of your hair into consideration.
What to use instead
You’ll have much more flexibility with professional tube dyes and developers (sold separately).
These are what they use at the salon when they mix up a colour for you. The best part is that they cost about the same (sometimes even less!) than those drugstore box dyes.
What!? I know, I was shocked too. You can get them at beauty supply stores or places like Sally Beauty online. I like the Ion Color Brilliance Creme for colour.
You can also mix colours together to get that perfect shade. Many salon colourists will do this “behind the scenes”.
About Developers
A developer is what you need to lift your hair with bleach and/or deposit a colour. Without it, hair lightening or colouring won’t work.
You’ll want to mix equal parts of the creme/tube colour with the developer of your choice. (Always check the product instructions to be sure of the ratio!)
But which one to use?? It depends on what you’re trying to do to your hair. They range from 10 volume to 40 volume:
40 volume – lifts pigment (lightens) 4 levels and deposits colour. Harshest on hair.
30 volume – lifts 2-3 levels and deposits colour.
20 volume – standard volume which is used in most salons for most situations. Gives equal lift and equal deposit. Lifts about 1 level.
10 volume – deposits colour only, no real lift. Good for grey coverage as well.
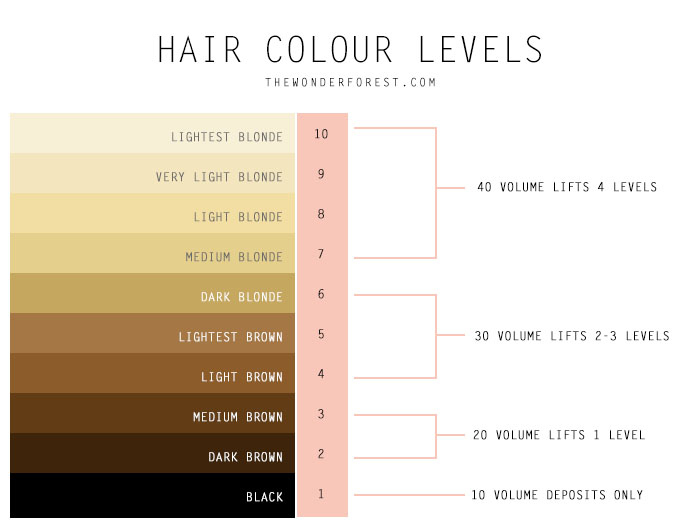
So basically, if you want to lighten your hair colour, you can pick the appropriate developer strength to help you get there. If you’re not looking to lighten and just want to apply the same or darker shade of dye, you wouldn’t need a developer which lifts much so try sticking with a 10 or even 5.
Using a 30 or 40 volume developer with bleach can be very damaging on your hair if you’re not careful. It is more-so recommended to use a 20 volume with bleach. You may not get the lightness you are looking for in the first application, however. Before applying another application, it’s best to wait a couple of weeks to allow your hair to have a break.
Two sessions of bleach + 20 volume developer will have lifted your hair 4 levels and should normally be a good light base for super light blonde hair (unless you’re starting with black hair… then you’ll likely need another application.)
Once you’ve chosen your developer (I personally like this Ion Sensitive Scalp type) just mix it up with equal parts of colour or bleach/lightening powder. It helps to use a little measuring spoon or container for this.
How do you know how long to leave it on?
Test it!! Do a strand test before you apply the mixture to your head.
Remember what I said about porosity up there^? The strand test will help you determine how long to leave your solution on for.
Chop a small bit of your hair from a less visible spot and apply the mixture to it. I usually do this on a piece of tinfoil.
Check on it every 10 minutes to see how it’s doing and once it reaches the desired look, rinse it under the tap.
There is no better way to determine the length of time than to do a test strand first.
Hair Lightening 101
I’ve been through a lot of hoops trying to get my hair to be the shade of blonde that I wanted.
If you want to make a dramatic change, sometimes bleach is necessary to get you there.
Bleach is definitely damaging to your hair, so you’ll want to exercise caution when doing this at home. It literally strips away the pigmentation of your hair.
You might also get some unexpected results, so please do a strand test for this as well before diving in!
I’ll share with you what I learned and how I went from a level 5/6 to a 10 safely (see chart above) after about 6 different strand tests (because I’m paranoid like that).

Wait to wash your hair – Don’t wash your hair the day before bleaching. You’ll want to keep the natural oils in there for protection as shampooing tends to strip them out.
You can also apply a coconut oil mask or other type of hair mask prior to bleaching for added protection.
Section your hair into 4 parts – down the middle vertically, then horizontally above your ears.
Start at the back – starting at the back/bottom of your hair tends to work best because the hair doesn’t absorb the bleach as easily as it does on the top, meaning you can leave it on a little longer as you do the rest of your head.

Why you might not get the right level
You can’t go from a level 2 (very dark brown) to a 10 (super light blonde) in one single application. It’s not possible as I explained above.
I know it’s tempting after you see Kim Kardashian go platinum blonde overnight, but did you see her hair afterwards? It was totally damaged and she couldn’t keep up with it and dyed it back 3 weeks later.

That had to have taken multiple applications in such a short amount of time.
Our hair naturally contains red pigments. Stripping the pigment away as you bleach will allow you to achieve a lighter result, but depending on the level you started with and your hair’s undertones, the final colour might not look how you expected it to.
Orange tones are bound to come out because that is just the natural lightening process! Red, to orange, to yellow. If you want silver hair, you need that light yellow shade!
If you don’t get the correct level the first time – wait to bleach it again if you want it lighter.
You need your hair to recover from this damaging process. Wait about two weeks before repeating the process if you absolutely need to.
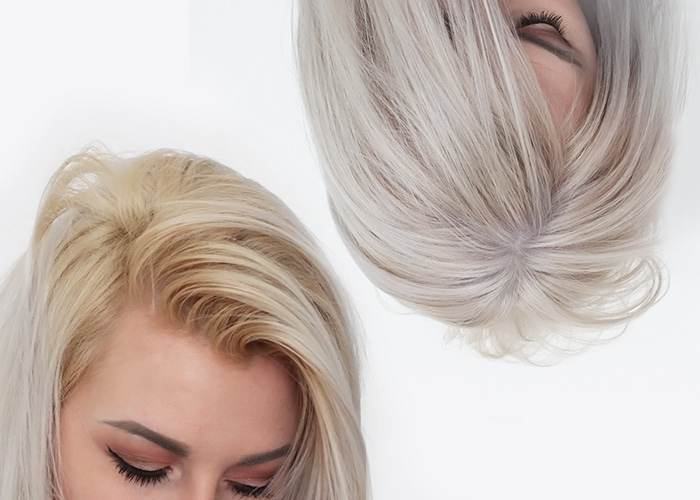
Toners
You can also use a toner on your hair if your shade isn’t ideal. Toners will not lighten the hair, but rather, they correct the tone of the hair colour, i.e. making it more ashy than yellow.
You can cool down your hue or warm it up with toners. Toners counteract their opposites on the colour wheel, for example:
- Blue neutralizes orange
- Purple neutralizes yellow
- Green neutralizes red
Check out my non-damaging DIY hair toner if you want to get rid of brassy tones!
Something to keep in mind (that frustrated me to no end) is that you need to have reached the proper level of lightness you want before applying a toner.
I wanted a nice light level 9/10 ashy blonde, but I had only lightened my hair to a level 8. The result: my toner of choice didn’t work at all.
That’s because it will not correct your level, it will simply neutralize the level you already have. Got it? Good!
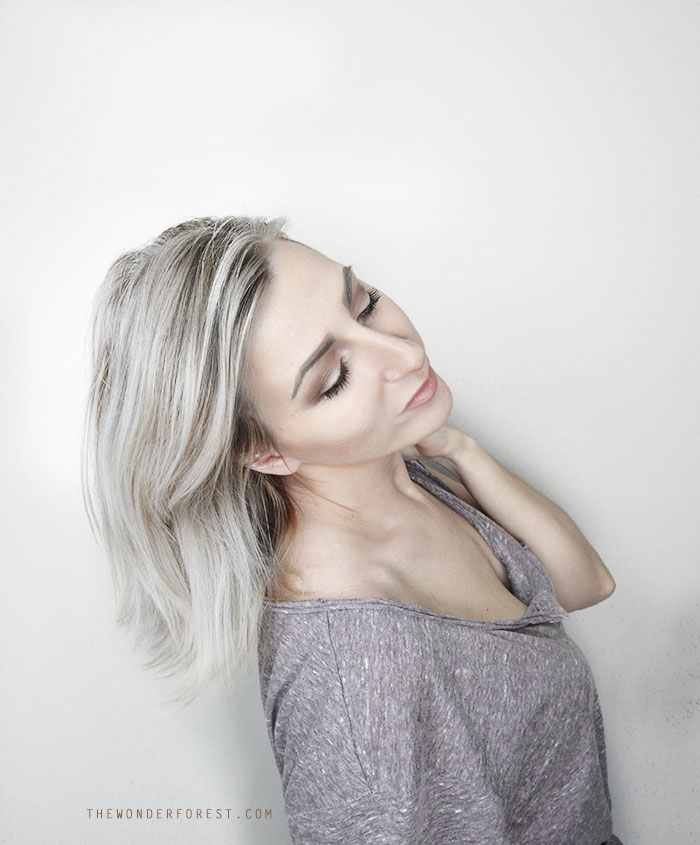
To see how I achieved silver hair, check out my Ultimate Guide to Silver/Grey Hair
My bleaching process
Now that you know the background, I thought I’d share my hair process so that you can see how all of this information comes together.
It can be confusing at first, especially if you’ve never done it before.
How to bleach your hair
1. Start out by checking the powder to developer ratio on your bleach/lightener container or inside on the instructions. Normally this is 1:2 (meaning 1 scoop of powder and 2 scoops of developer). Use the same scoop that comes with the powder, or use a tablespoon if your bleach didn’t come with one. The consistency should be like mayonnaise.
2. Section off your hair into 4 parts — part it straight down the center, then horizontally from behind one ear to the other.
3. Starting with the bottom back section, use the tint brush to apply the bleach mixture to thin sections of hair. Work your way around the bottom of your head on each section and finally up to the top.
4. Do the same with the remaining sections of hair, working in thin sections and fully covering the hair with the mixture or just the roots if you’re only doing a touch-up.
5. When your hair is covered, cover your head with saran wrap or a shower cap to keep the bleach from drying out. If it dries out, it stops working!
6. Set your timer for 30 minutes and check on it often. The time will depend on your own hair and how well it takes. (remember the strand test we did above?!)
7. When time is up, rinse it out with water and either shampoo it or use a purple shampoo like Shimmer Lights. This purple shampoo will help to tone out any brassiness after bleaching. Do not apply conditioner if you are going to tone or colour it!! It will close up your cuticles and make it harder for the toner to penetrate.
8. Towel dry your hair, and comb out tangles carefully.
9. Mix the toner of your choice (I suggest Wella T18) with 20 volume developer as per the directions on the bottle. Alternatively, create your own non-damaging toner by following my guide. Apply to head all over again, this time letting it sit for about 20-30 minutes. Check on it often. You can test it by rinsing a tiny bit of it off your hair to see if it has worked.
10. Rinse hair and condition really well! You can do some hair conditioning masks afterwards as well to restore shine and moisture to your hair. I always recommend the Olaplex system which helps restore your hair after bleaching.
*Note that I did the bleaching process twice to get to the current level I wanted, over a span of a few weeks.
I hope that this information can be useful to you as it has been for me on this journey! If you have any tips of your own, feel free to leave them in the comments for others to check out as well!
Products Mentioned:
See also: Brass Banishing DIY Hair Toner for Blondes

See also: Ultimate Guide to Achieving Silver/Grey Hair at Home
Last Updated on
Will bleaching dyed but mostly faded hair work?? (Natural colour was about a 4, now its a bit darker [maybe 5/6?] with purple/red undertones) Thanks 🙂 Great post!
I’ve been reading for hours and your blog is by far the best information I’ve come across – thank you! I wanted to ask about your technique for balyage, how do you ensure you’re not left with a sudden change of colour – that well demarcated line that can happen? Your photos look like you have a really nice gradual colour change
To do that, I cover the ends in the bleach, then with the brush vertical, paint it upwards lightly… with much less bleach on the brush. There are a few youtube tutorials you can watch to see how it’s done! You sort of apply it in a V shape, painting each chunk vertically
Oh yeah, I didn’t even think of YouTube. Thank you xx
Hi! My natural hair is dark. I bleached it once with 30 volume developer with Wella powder (but I think I would not get brassy tones if I use the Lo’real Quick Blue bleach right because it has blue in it ? ). It turns my hair yellow, not orange because I bleached the root only and left for like almost 1 hour after finishing putting it for about 30 mins or so. Should I wait about 2 weeks because it is now about lvl 6 or 7. Do I use like a 20 volume developer on it and it is enough to turn it blonde like the rest of my hair ?
Hi,..
This is Caiman Haiti Foundation Inc. (CHFI).We are hoping that you will visit our online fundraising campaign, please also pray for our organization and give what you can. Here are the links:
• https://www.youcaring.com/nonprofits/empowering-haitian-women-and-children/353623
• https://www.crowdrise.com/empoweringhaiti1/fundraiser/gabriellaine
• https://www.gofundme.com/thjj388s
If you can’t give right now, consider sharing our link with your friends, family and colleagues through Facebook, Twitter, email or word-of-mouth to spread awareness.
Thanks, again, for helping us reach our goal. I appreciate your support!
–Chris Stewart–
I am 29 and a middle school teacher. I had a bad experience of a chemical burn from a salon and then I decided to get myself an alternative of it. I have colored my hair since I’m 16 and always tried to get a natural-looking color. After a lot of research and suggestion from friends I decided to try the https://www.thehennaguys.com/ Henna hair color . Not quickly but eventually I reached to the color I desired. The best thing about it is that it’s convenient to use, easy application. Just keep following the instructions on the pack and you r done. I totally recommend this to women who want versatility in their personalities and hair colors.
Oh my land, thank you for this post! I’m new at home hair care so I have one question: in your post you mention both a creme tube dye and a lightening powder. Do you use both? Just one or the other? How do you decide?
They are different things. A lightening powder is a bleach which is mixed with developer to get your hair as light as you need it to be. Afterwards, if you want to add a colour to your hair, you would get the tube of colour and mix with developer and apply it to your lightened hair. Hope that helps!
Help! I rushed the process of wanting to get it silver. I ended up with patchy silver/ash blonde and the overall color turned out green-ish???
How can I fix this patchyness? I have 3 dye colors in my hair right now from attempting to fix this hair color. I used Ion Brilliance Permanent Chrome color with a 5 developer. Then when it came out gross, I dyed it the next day with a Ion Semi-Permanent Titanium color which made it more blue-ish color…??? Then 5 days later I tried to cover it with Ion Semi-Permanent Violet Gray color to even out the tone of my hair but…I’m wondering if I wait a few weeks for my head and scalp to recover to revisit the Chrome dye with developer to get the silver I wanted? And also, do I need to strip the Semi-Permanent dye I put in my hair?
Bleach bath.
Hi! This is the best article I have found yet about bleaching! I think I finally understand it now- but I have a question. My whole head is dark brown. Say i start the process to get my hair blonde over time. But How do I handle outgrowth? Will my roots just always be a shade darker than the rest of my hair? I’m sorry if this question has already been asked, I just am afraid to start dyeing my hair lighter if I don’t know how to do my roots! Thank you:)
You will have to complete the bleaching process on your roots as they grow in. It will be less work then the all over initial bleaching. Take care not to overlap the bleached growth with the new bleaching and the results should be the same.