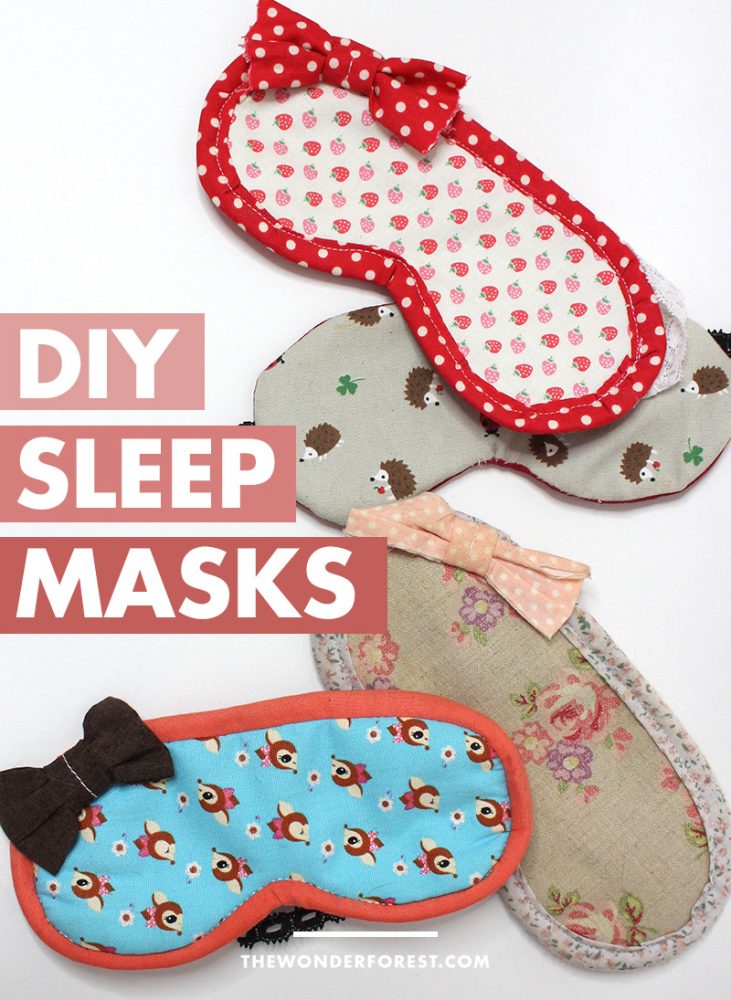
The almighty sleep mask. They’re the perfect companion for both travel and home and a lifesaver for those of us who can’t readily fall asleep wherever and whenever we like.
I just so happen to be one of those people who can’t easily fall into dream land and find that a sleep mask is often a necessity.
One night, as I was laying in bed trying to force myself into a coma, it occurred to me that I had no idea where my trusty eye mask was since reorganizing the bedroom (thanks, Marie Kondo!).
I really didn’t want to start searching for it in the middle of the night so I made a note to myself to get crafty make a new one the very next day instead.
So I did. And let me tell you, this thing has magic powers. I was out in a wink as soon as I put it on. Another awesome project checked off of my super cozy DIY projects list.

Blackout style DIY sleep mask
I decided to create it with three layers of fabric. A back layer for ultra comfortable softness on my face, a middle layer to help block more light, and a top layer that just looks cute and stylish! I finished it with a cute little bow… because… why not?
Bonus: these make great little gifts! Here’s how to make your own…
How To Sew a Sleep Mask
I’ll give you two options, with the trim and without the trim. The trim is a little tricky for beginners (even I cursed it to death) so I wrote out an alternative below for an easier and much quicker option.
Supplies You will need:
- a scrap of patterned fabric for the front
- interfacing or felt for the interior
- a soft fabric for the back, (I used satin on this one, and a super soft minky fabric on the pink one)
- a piece of elastic
- a strip of fabric OR bias tape for the trim (optional).
- You will also need the pattern I made for you too. Just click here to open it in a new window, right click, then “Save Image As” to save it to your computer and print.
Sewing With The Trim
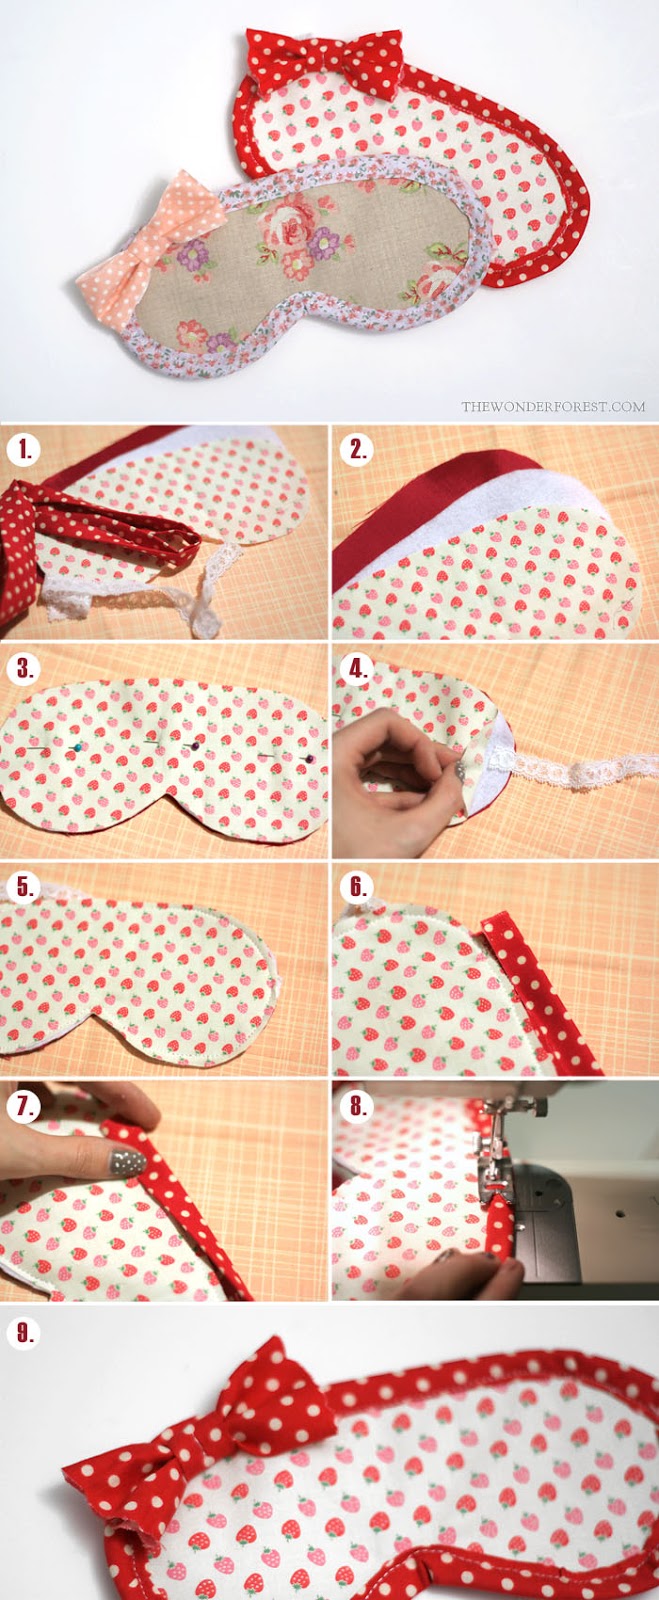
This option will explain how to sew the sleep mask with a trim of fabric or binding around the outer edge. It adds a more finished look, but does take a little more time and precision. Reference the image below for a visual while following the steps.
- Gather your supplies.
- Using the pattern from the supplies list above, you’ll want to cut three identical pieces from each fabric.
- Pin all three layers together down the center to hold them all in place.
- Cut your lace/elastic to length. I just measure it half way around my head and make sure it’s not loose. You want it fairly snug so it stays put. Place one end just under the outer layer of fabric. Pin in place. Do the same to the other side, making sure your elastic isn’t twisted when you carry it over to the other side.
- Sew around the parameter of the mask, about 1/4 of an inch or as tight to the edge as you can get. This just makes it easier for when we add the trim.
- Time to add your trim. Place the underside of the trim underneath your sleep mask…
- Fold the remaining trim over the top of your mask.
- Hold in place and sew the trim on. Go slowly around the bends as it does get a little tricky. When you come to your elastic ends, just make sure they are folded under nicely and not bent. You will be sewing right over the edges of them.
- Finish and decorate with cute bows or other adornments!
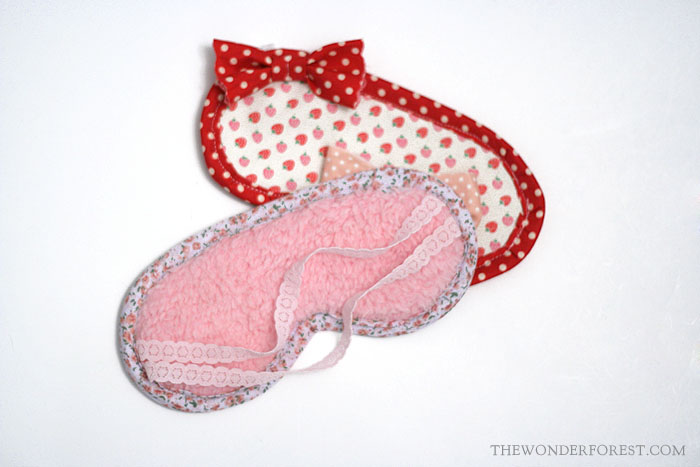
This photo shows the super soft backing of my pink one. I also doubled up the elastic for a different look.

Sewing Without The Trim
- Follow steps 1 and 2 above.
- Place your outer (patterned) fabric face up on your working surface.
- Instead of placing the elastic on the outside as shown above, you’re going to want to place it on the inside. We are making this one inside out. Attach the ends of the elastic in the same place as shown above in figure 4, only the ends of the elastic should line up with the outer edges of the mask.
- Lay the backing piece face down on top of the first piece. The elastic is now sandwiched between these two layers.
- Place your interfacing/felt on top of these two layers. Pin layers together as shown in figure 3 above.
- Sew around the parameter as in figure 5 (remembering that this one is inside out though.) Be sure to leave a 2 inch gap free (i.e. don’t sew the last 2 inches!). Keep an eye on your elastic inside of the sleep mask, you don’t want to mistakenly sew over it in a random place!
- Turn the mask inside out through the hole you left (or is it right side in?! you get the point…). Stitch the hole shut and your mask is done!
Sweet dreams!
You might also like:
How To Make a Macrame Rope Rainbow
Easy Sew T-Shirt Headband Tutorial
Last Updated on


Wow nice tutorial of eye mask and best for sleeping and easy to use http://bit.ly/2tZtmWq