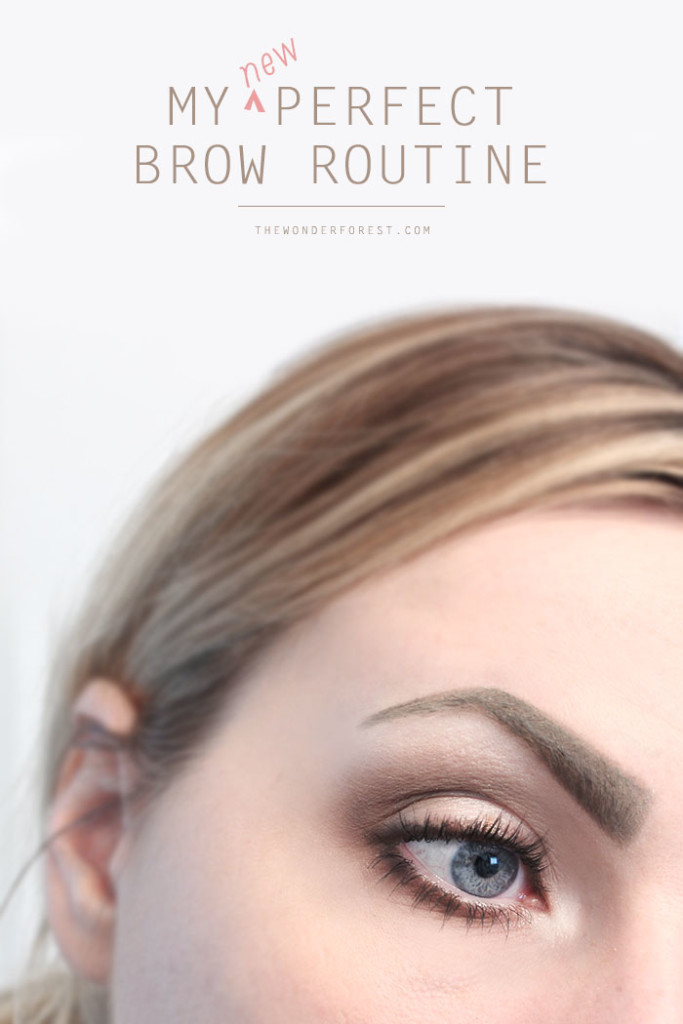
I’ve gone through many phases with my brows. I’ve experimented with colours, techniques, and products, and have shared a few of them here before. I thought it was about time to do an updated eyebrow routine because this method has been my go-to process for getting my “perfect” (according to my taste) brows that are even on both sides. Don’t you hate doing one perfect brow, and then being unable to match it on the other side!? Annoying!
I’ve outlined the process for you below. This method uses the classic eyebrow shaping rules that many of you have probably heard about before, but with a little trick to make sure your lines are flawless!
The first couple of photos show you what my brows naturally look like. They are pretty much non existent and the hairs sort of meet in the middle (if you’re wondering if I shape them this way, I don’t. I rarely ever pluck them, aside from a few strays. This is just them, in all of their weird and unattractive glory!!). Whether or not you have thin or thick brows, this method should still work well for you. You can take a look at my previous post to experiment with different eyebrow shapes to suit your face shape if you like.
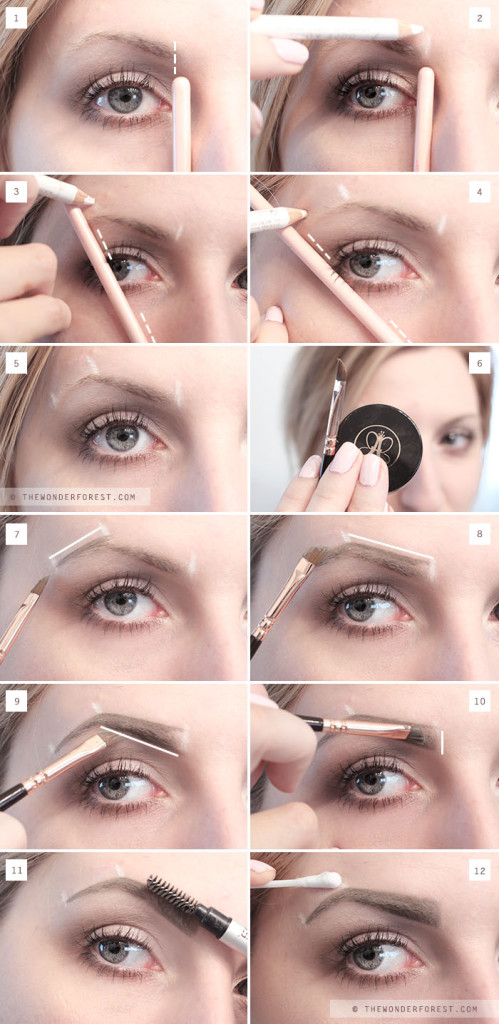
1. With a thin handled brush, rest the edge of it against your nostril and hold it straight up and down. This is where your brow should start.
2. Remember when I said I have a trick for you? The trick is this white eyeliner pencil. It helps to use it as a guide so all you have to do is connect your lines for that perfect shape! Draw a line at the tip of the brush.
3. With one end of the brush on your nostril still, rotate it so the edge passes through the center of your iris. This is where your second line will go. Be sure to mark it above your brow and in line with the iris. You may need to bump your brush handle over a bit to place the line in the proper place.
4. With the end of your brush still on your nostril, rotate it and line it up with the corner of your eye. Draw a line the same as before in this place.
5. You should have three lines like this!
6. Grab your brow product of choice. I am using Anastasia DipBrow Pomade in Taupe and a thin angled brush to apply. I love this stuff more than words!
7. Start at your arch and draw your first line from the arch to the tail end, to connect your lines.
8. Then, draw another line from the beginning of the brow to the arch to connect those lines.
9. Run a line of product directly under your brow as well, ending at your arch.
10. For the inner edge, use your brush vertically and use short, light strokes to cover the white line. Use short strokes to fill in the remainder of your brows.
11. Brush your brows upwards with a spoolie brush to finish.
12. With a q-tip, gently erase the remaining white lines. Repeat on the other side and you’re done!
The lines totally help make everything even and it saves a lot of time trying to match your opposite eyebrow, since they’ll be placed in the same spots on both eyes. Give it a try and let me know how you do!
You might also like:
How To Use Eyebrow Stencils Like a Pro
8 Different Eyebrow Shapes
Anastasia Dipbrow Review
Last Updated on


