
Creating a seamless pattern in Adobe Illustrator is particularly useful when designing things like phone cases, home decor items and website elements.
Luckily, it’s also very easy to get the hang of! Follow along as Cassandra of Peony and Ink gives the step-by-step instructions on how to make it happen.
How to create a pattern in Illustrator
In the tutorial below, we will guide you step-by-step through the process of creating a seamless repeating pattern in Adobe Illustrator. This method explains the basic methods for creating a pattern that can be applied to virtually any design motif that you create.
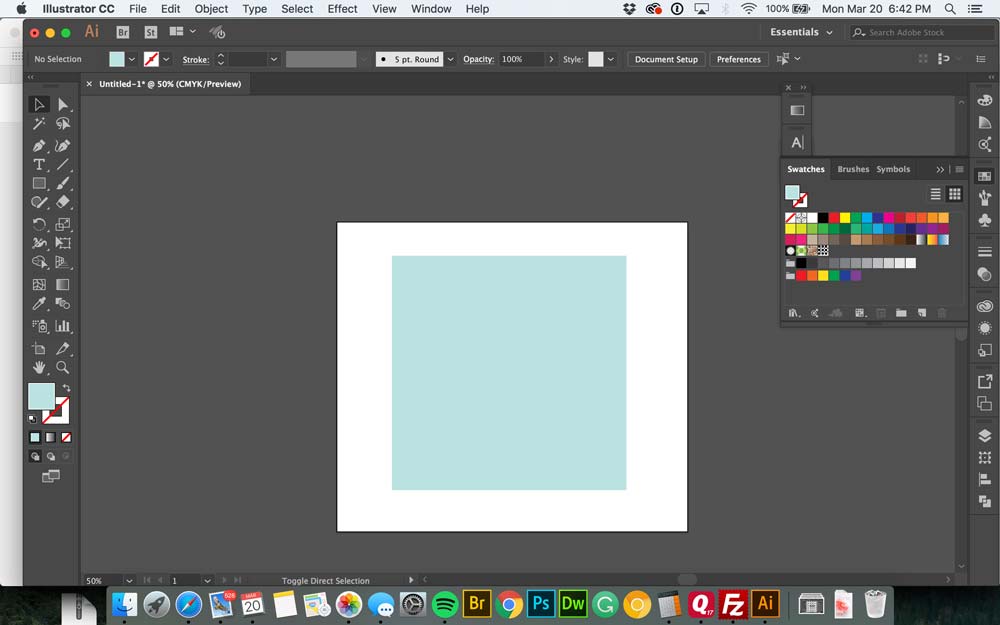
Step 1 – Create Your Document
In a new document, select the rectangle tool and create a 600px x 600px box. The size doesn’t matter as much as it needing to be square, it will make creating your pattern easier!
Step 2 – Creating Your Pattern
Start arranging your elements. You can arrange the interior elements any way you’d like, but the edges need to mirror each other to make your pattern seamless.
Start with one of your edges (I began at the bottom), and place your elements with parts outside of the square. Select each element, then right click and select Transform > Move.
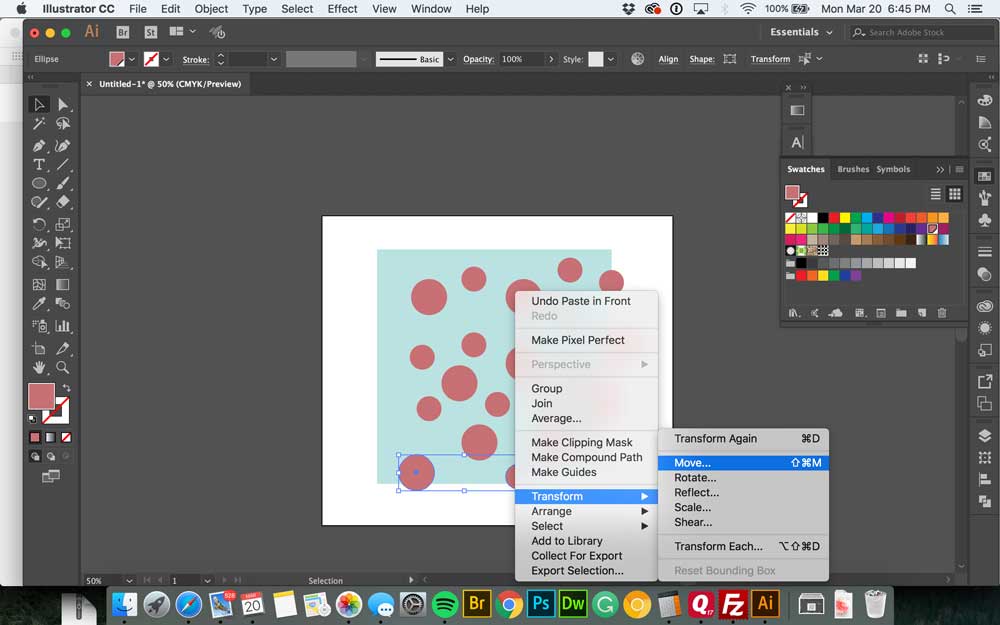
Since the height of our square is 600px, set your vertical position to -600px and the horizontal to 0. The positioning may seem a little counter-intuitive at first, but because we are starting with our bottom edge (600px) and we want to move it to the top (0px), we need to subtract 600px to get there. If you started at the top, your edge would be at 0px, and you would need to add 600px to move to the bottom edge.
Check the preview box so you can make sure you are moving in the right direction and then click Copy.
Do the same with your sides, only this time you will be changing the horizontal position and setting the vertical position to zero.
Once you have your edges done, you can rearrange anything in the middle, but not the edges. If you move an edge element, your pattern will no longer be seamless.
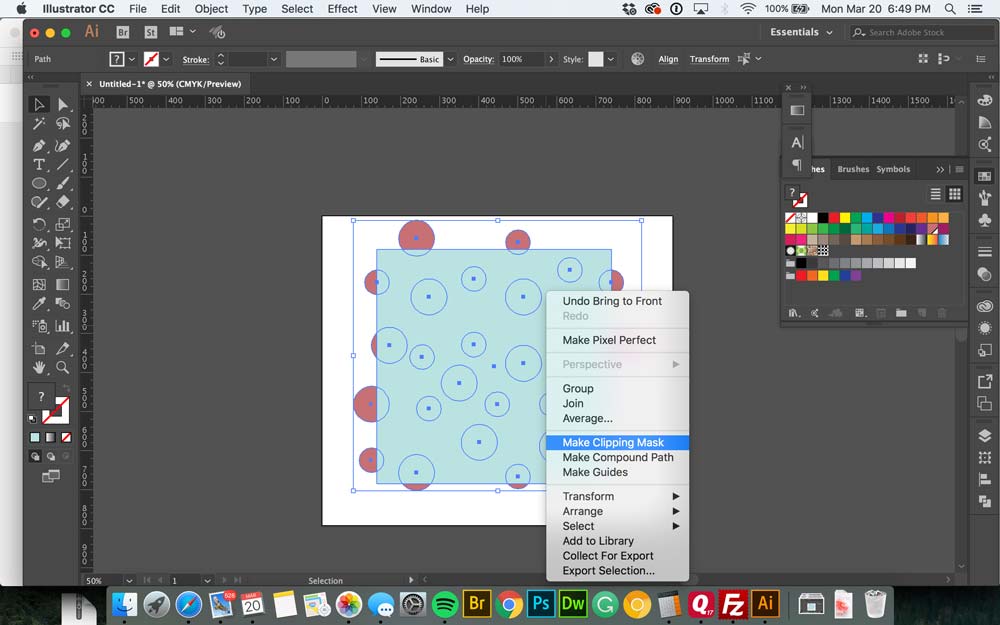
Step 3 – Make Clipping Mask
Click the square in the background and click Edit>Copy, then Edit>Paste in Front, and bring that copy to the front (Object>Arrange>Bring to Front). Next, select everything and make a clipping mask by right clicking and hitting Make Clipping Mask.
Step 4 – Make Your Pattern
With everything still selected, go to Object>Pattern>Make which will open the Pattern Options window. For a simple pattern like this, you don’t need to do much (if anything) to the default options, just make sure you have your Tile Type set to Grid, or else your pattern is going to go all crazy!

Step 5 – Save Your Pattern
Name your pattern and click Done at the top. Now your pattern will be in your Swatches palette.
Step 6 – Apply Your Pattern
To apply your pattern, click on your rectangle tool and draw a rectangle of any size, then click your pattern in the Swatches palette (make sure you are changing the fill and not the stroke!).
Step 7 – Resize Your Pattern
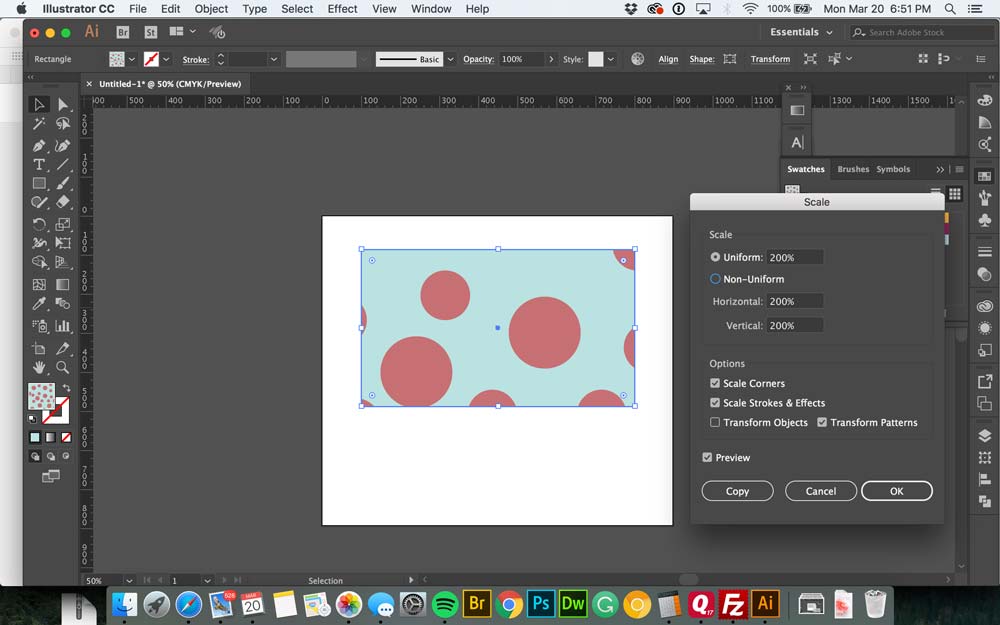
If you’d like to resize either your pattern, your shape or both, right click on your shape and go to Transform>Scale. Here you will have a few different options.
How to Enlarge or Shrink Your Illustrator Pattern
Make sure all options are checked except Transform Objects. Then enter in your percentage to increase or decrease your pattern in the Uniform option. Check the Preview box, and you can play with the percentage until you are happy with how everything looks.
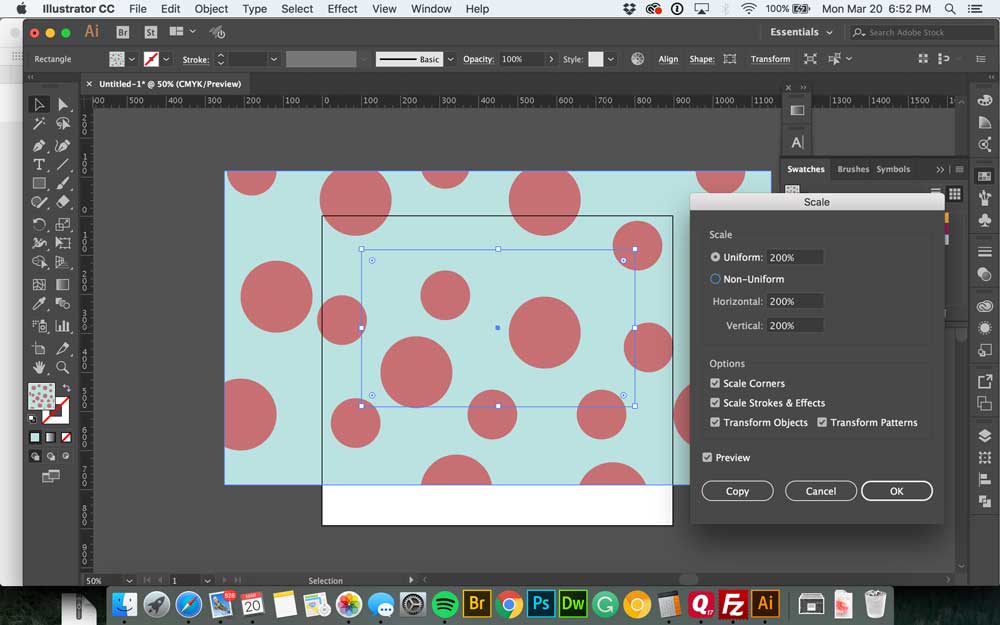
To Enlarge or Shrink Your Object
Select all options except Transform Pattern.
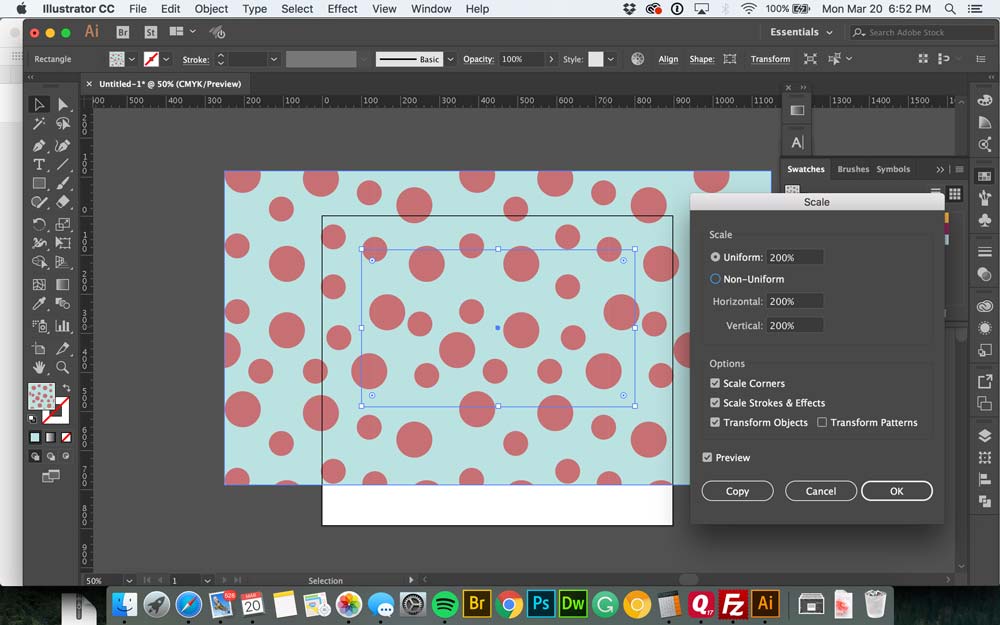
To Enlarge or Shrink Your Object and Pattern Proportionally
Check all options.
Step 9
If you’d like to edit your pattern, double-click the pattern swatch and it will open up the Pattern Options window. Here you can change colours, move elements around, and add or delete elements. If you want to save a copy of your pattern, instead of replacing your original pattern, make sure to click Save a Copy and not Done.
Hopefully, this helps demystify the process to create seamless patterns!
Pin this for later:
Last Updated on
Awesome tutorial, thank you for the time and sharing