
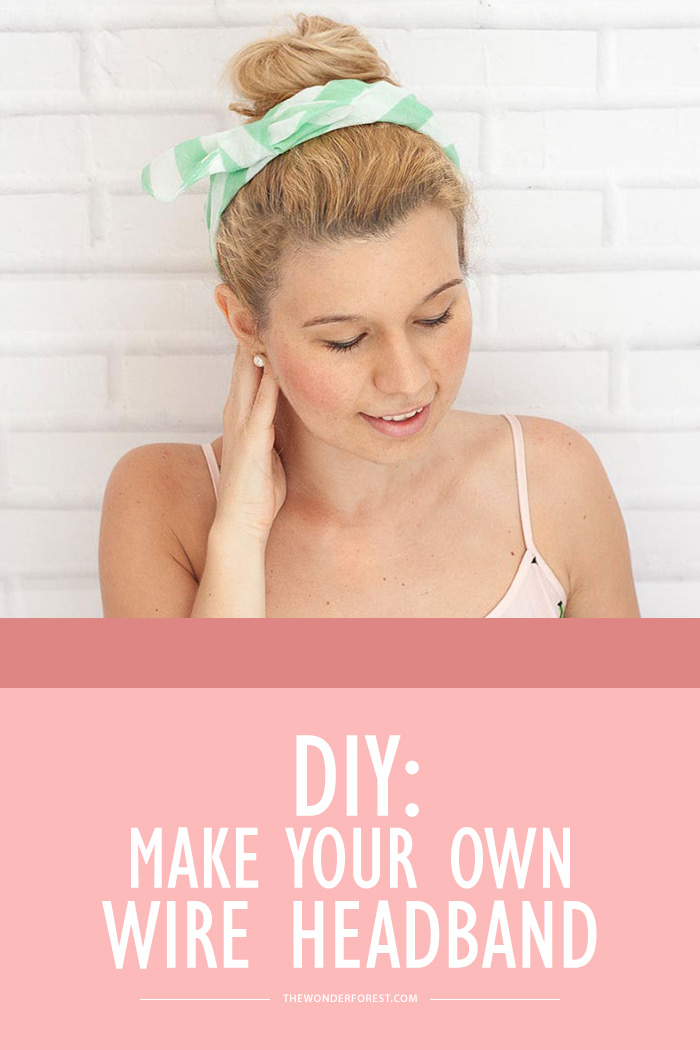
Summer is almost through, but that doesn’t mean there aren’t last minute trips to the beach or mini vacations to discover a new city. Keeping your mane in some kind of order is a must, particularly for hot days. Headbands combined with a nice high bun or with a low loose braid, can be game changers!
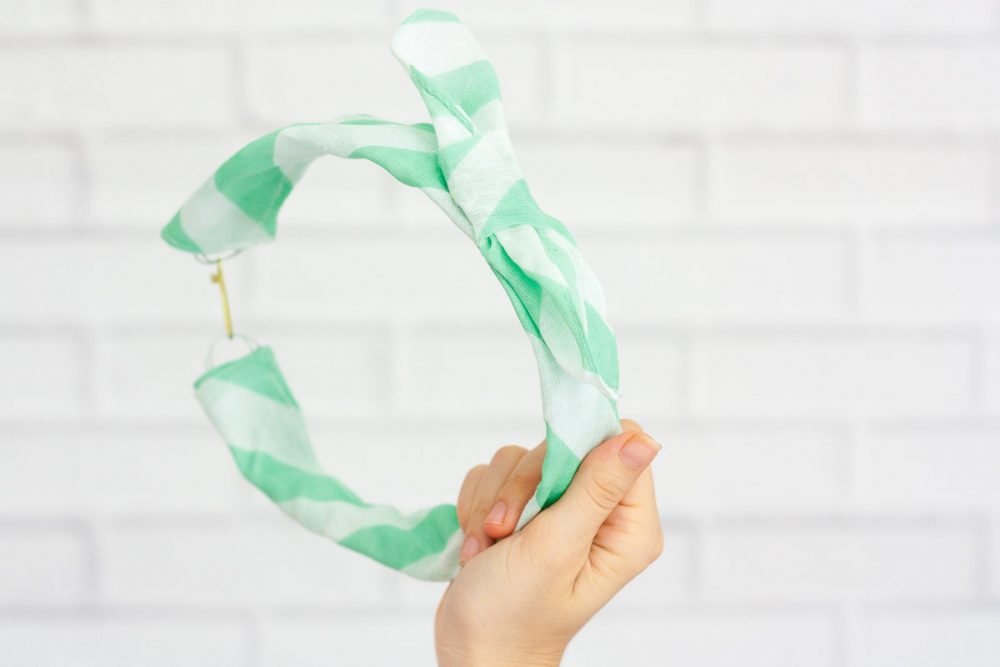
This design is halfway between a bandana and a stiff headband and is very comfortable because of its wire semi-rigid structure. It adapts greatly to the shape of your head and keeps hair in place. Plus, I love the fact that the textile doesn’t collapse and twist on itself, leaving the pattern well visible. Let’s see how you can assemble yours with your fave fabric!
Supplies
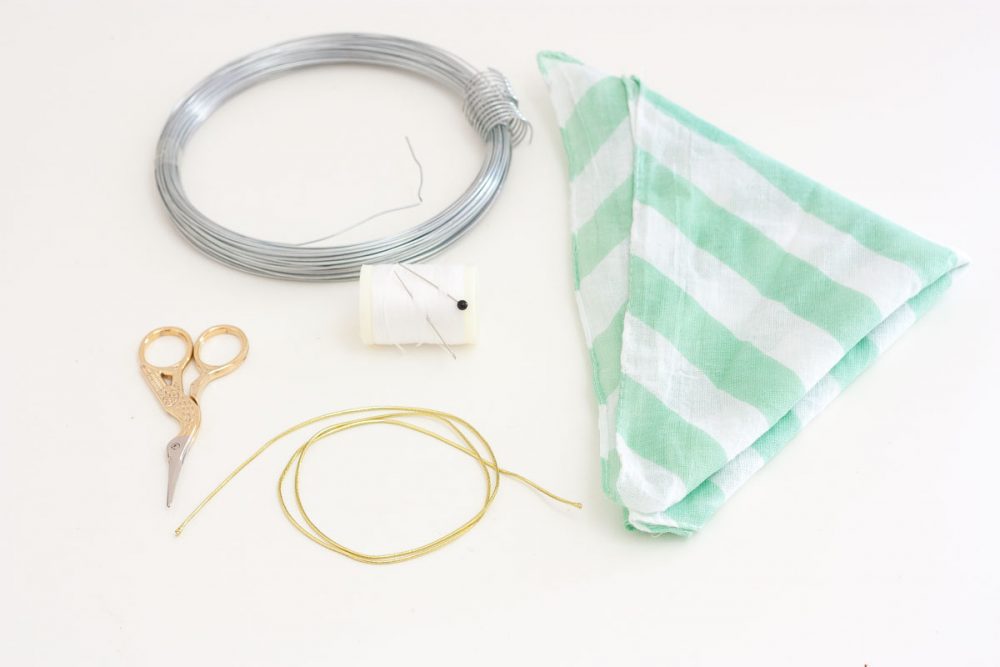
Textile of your choice
Scissors
Semi rigid wire
Thread and needle
Hot glue
Elastic thread or elastic band
Instructions
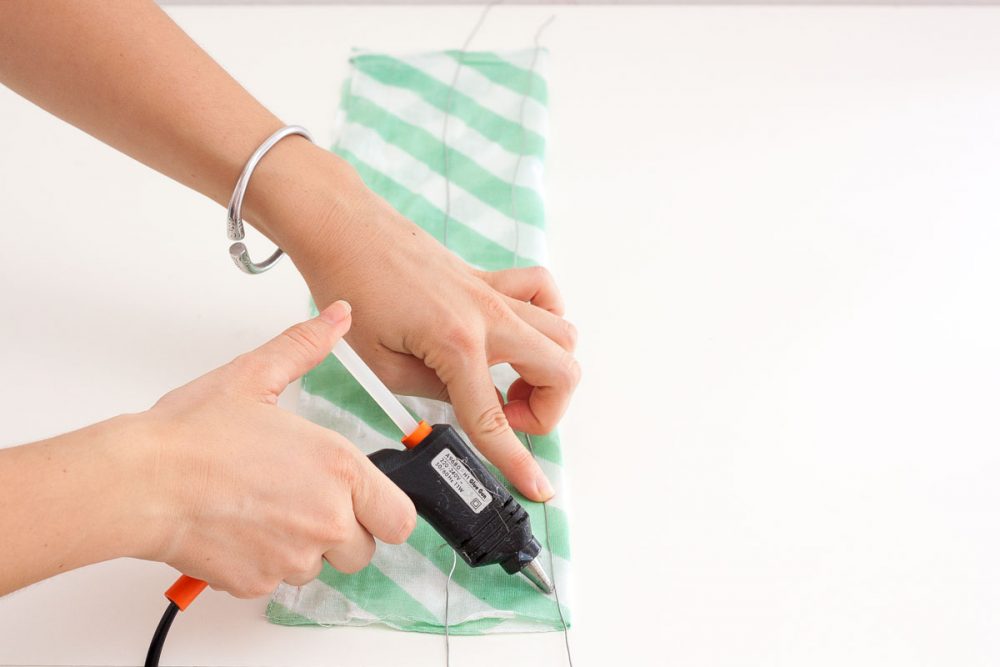
1. Measure the length of your headband so it goes from behind one ear to another. Bend the textile 4 times making a 3cm wide sausage and cut any exceeding cloth.

2. Open your cloth and bend it just in half. Cut enough length of wire so that it covers all the headband’s length and hot glue two wire sticks to a half of the bent cloth, like in the reference below. Let the glue dry well.
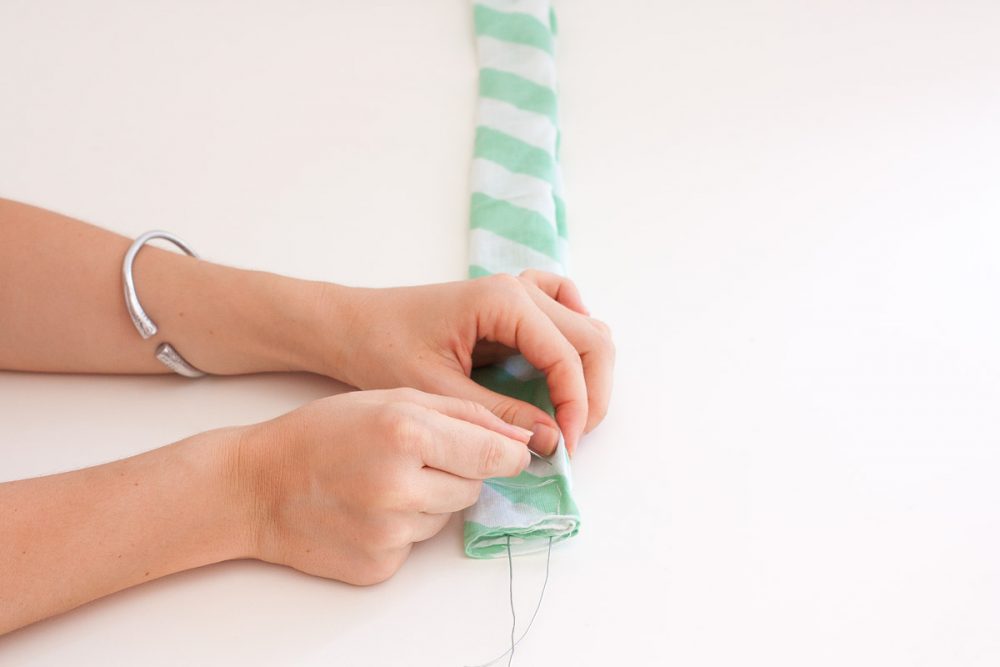
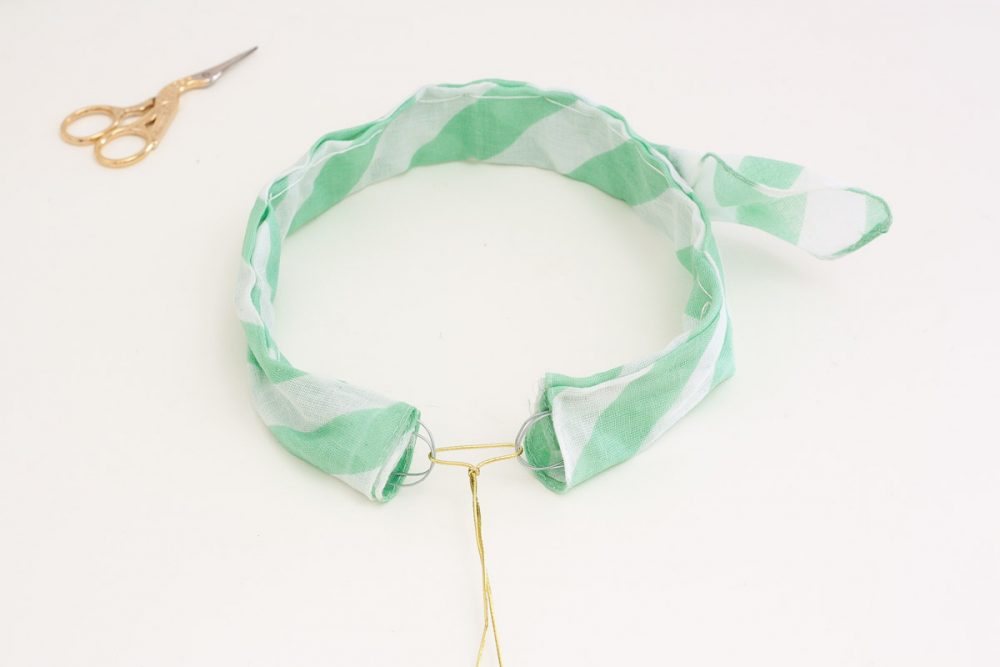
3. Bend the cloth in half to cover your wires and hand or machine sew (if you machine sew, keep your needle distant from the wire or it could break) to close it. Bend inwards the wire that is popping out at each end.
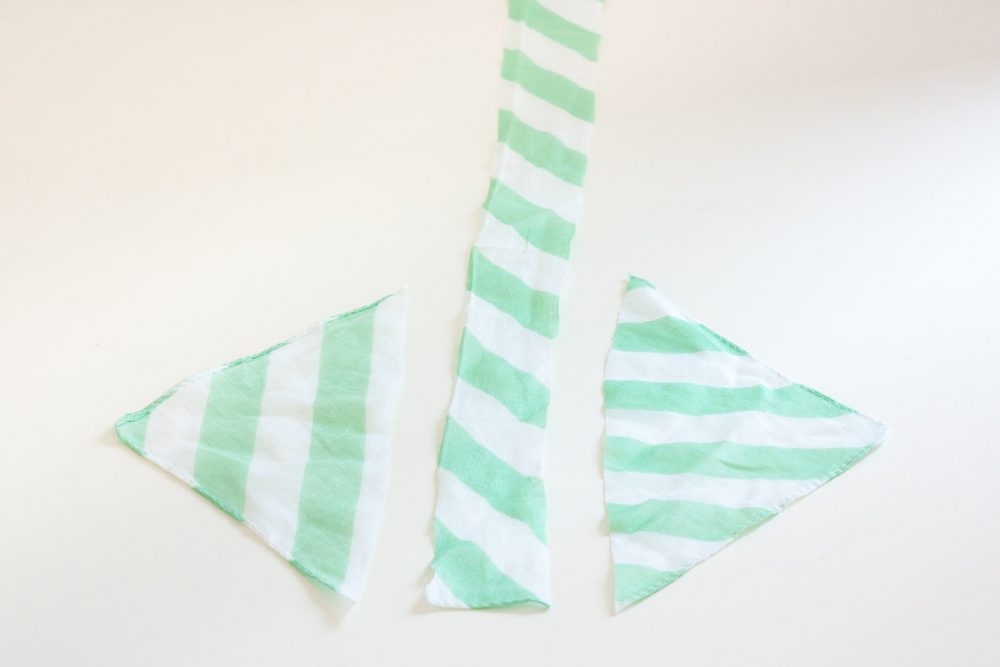
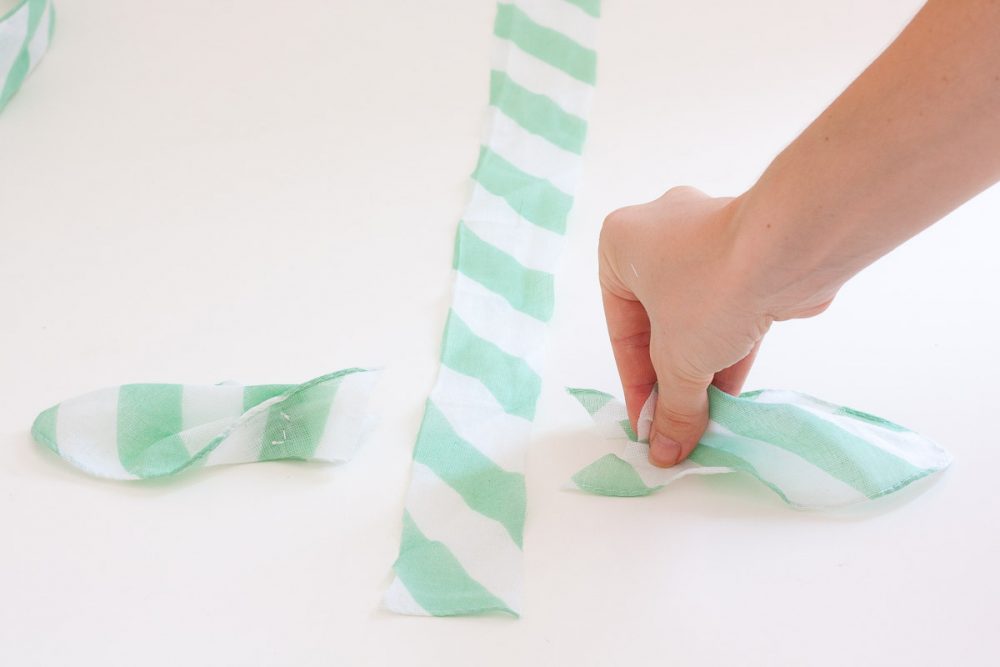
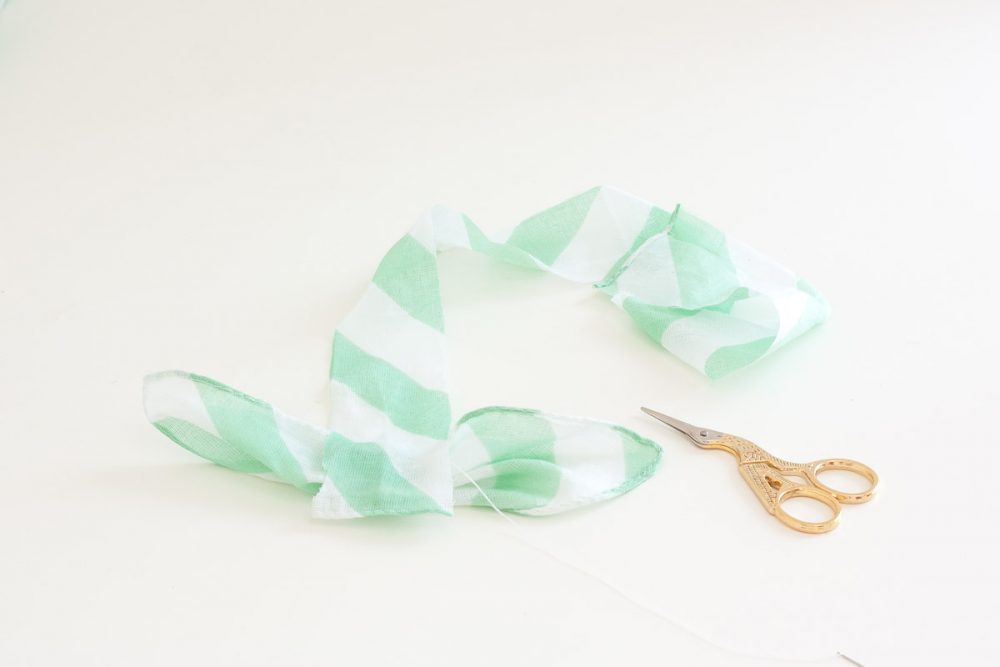
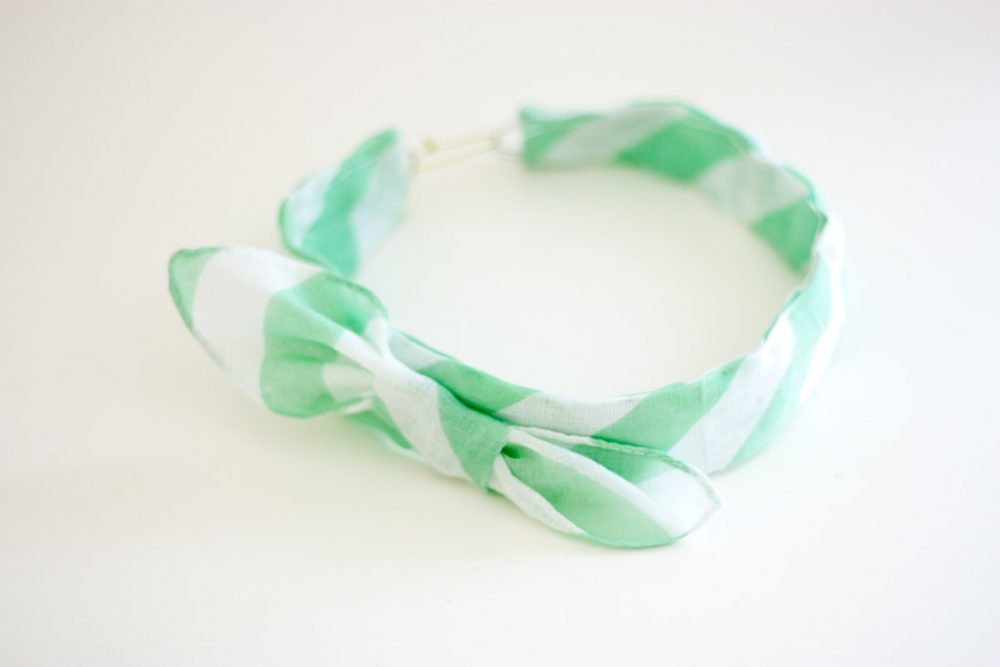
4. For the ribbon, cut 2 triangles and a narrow piece. Notice that I carefully picked edges that had already seams for the triangles, as this simplifies the job so much. If you have to machine seam yourself, make sure you master the technique because this part is quite visible. Pinch the triangles and sew them in place. Then, put the two pinched triangles together with the parts facing opposite each other. Make the narrow cloth do a couple of turns in the center while it covers your stitches. Sew in place on the back.
5. Try it on your head to find the right place and inclination to glue the ribbon.
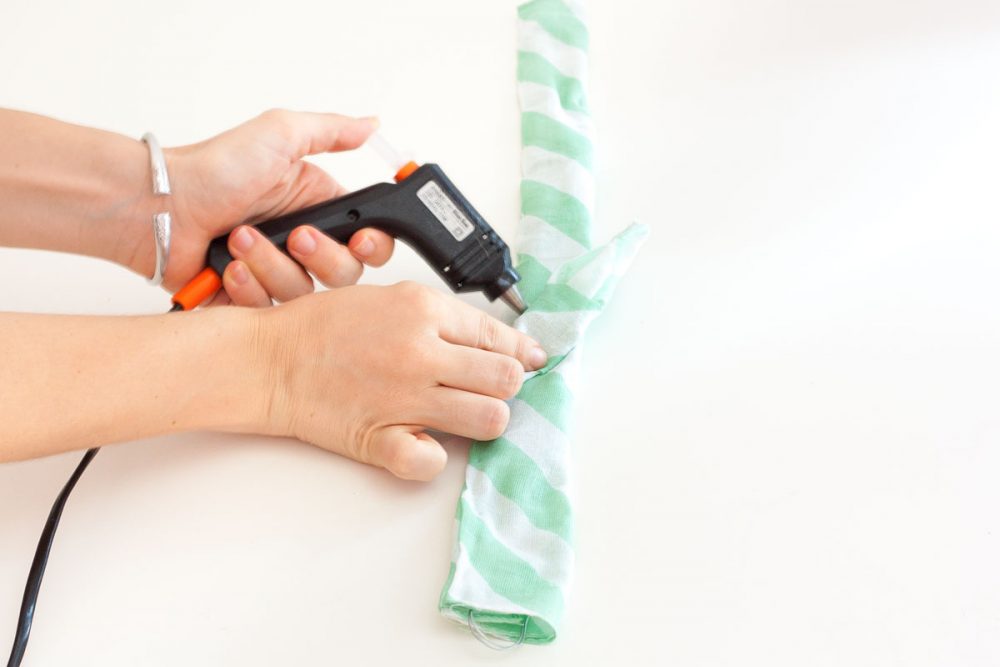
6. Finally, add an elastic to the rear part, where we folded the wire at step three. Done!
Last Updated on
This is such a genius idea! I would have had no idea that there was wire in this and that the bow is perfectly glued on – it looks like you’ve just effortlessly chucked it up into a headband!!
Jodie @ Jodetopia x
Hahah thanks Jodie 😉 it’s actually quite simple to put up if you wish to give it a shot!
XO
Chiara & Irene
http://www.one-o.it