

Checklists and notes. Aren’t they totally life savers? Trying to remember all the the things you have to do, upcoming events and random bursts of inspiration…there’s no way all these things are going to fit in our memory!
There are tons of apps that can double as reminders and notepads. On the other hand, if you’re old fashioned like us, paper and pen are still your best friends. So why not make your own notebook? A little bit of bookbinding skills are all you need, and even if you don’t have it, just follow along and develop your knowledge from scratch.
You Will Need
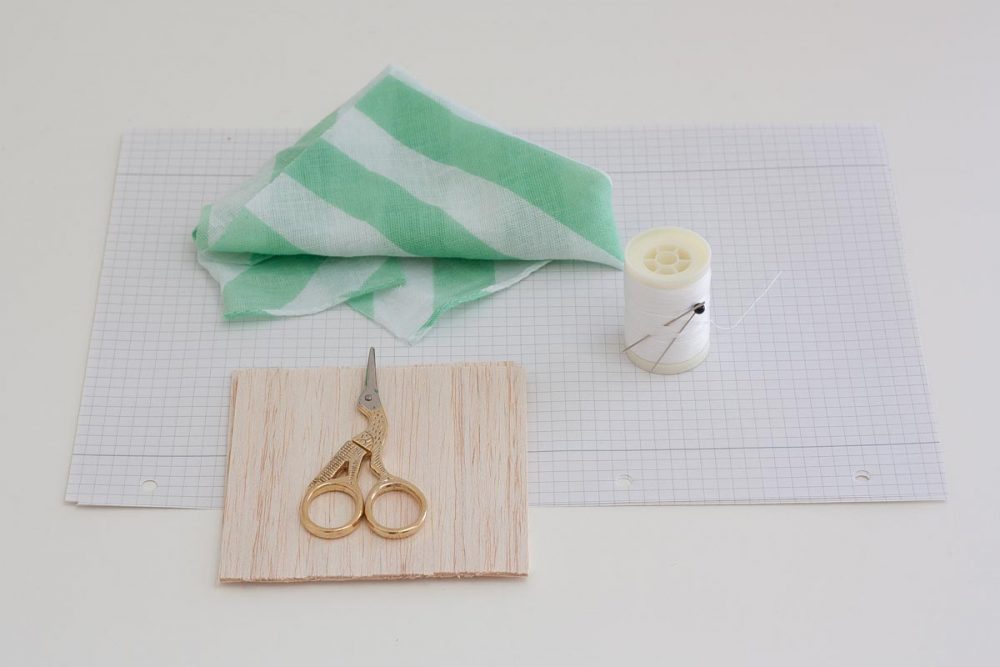
Balsa wood
Paper
Vinyl glue or mod podge
Cloth or adhesive textile
Scissors
Thread and needle
Step 1
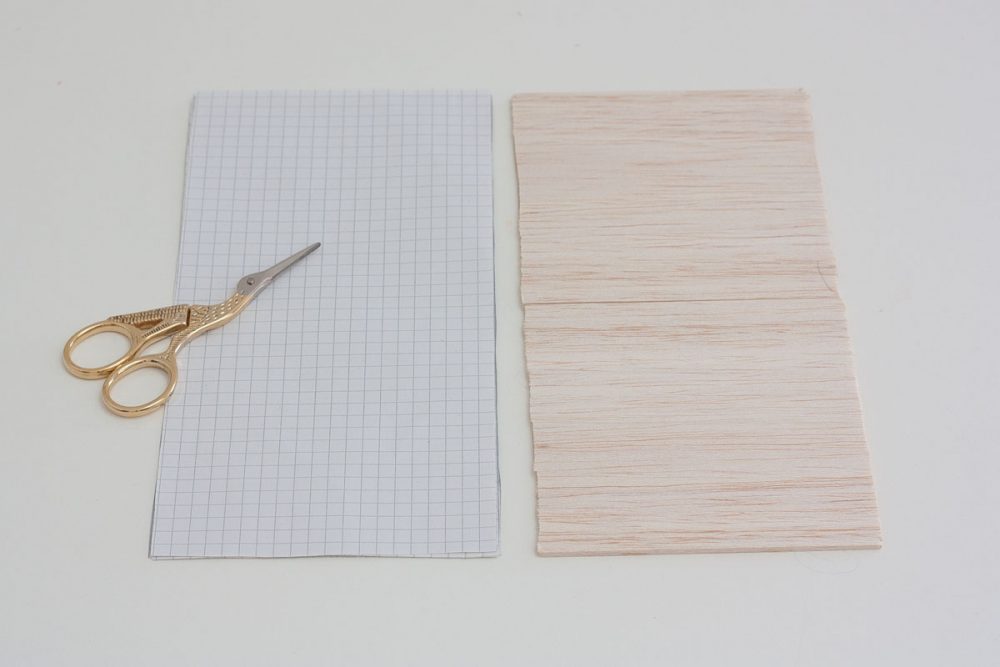 Cut your balsa wood sheet into two 10x10cm squares. We had ours already cut. Cut at least 8 strands of paper 20x10cm, the size of your wood covers. You can go up to 12-13 sheets of paper, but don’t do too many pages as you’ll need to be able to make a hole in all of them.
Step 2
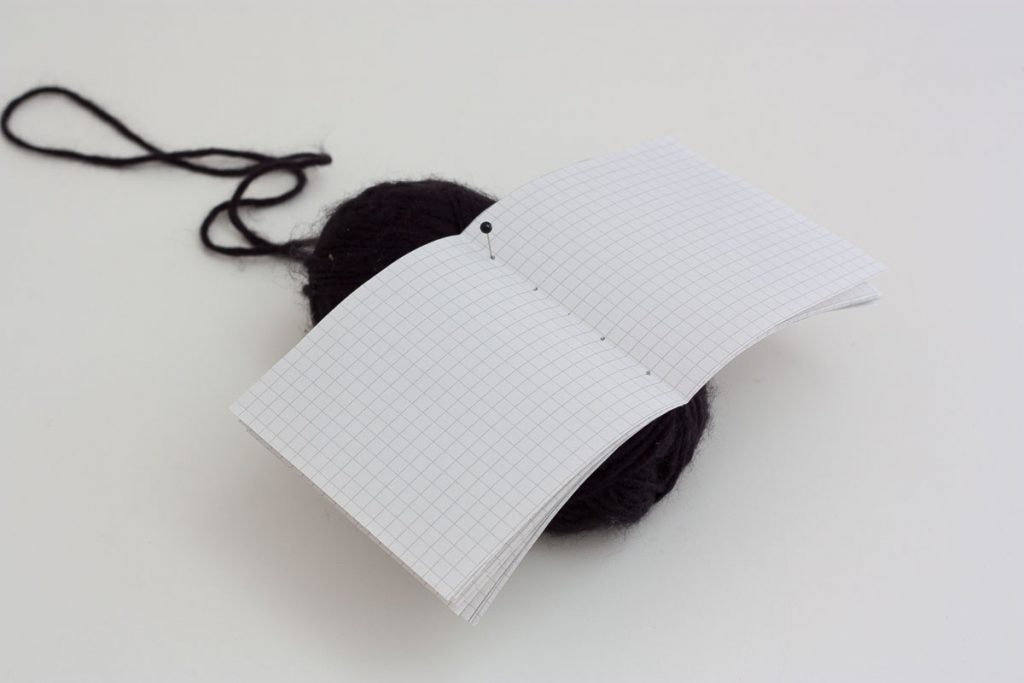
Bend your papers in half – this will be the core of the notebook. Make 4 holes inside the bend line using a pin or your needle. If you place the paper on something soft, making holes is much easier.
Step 3
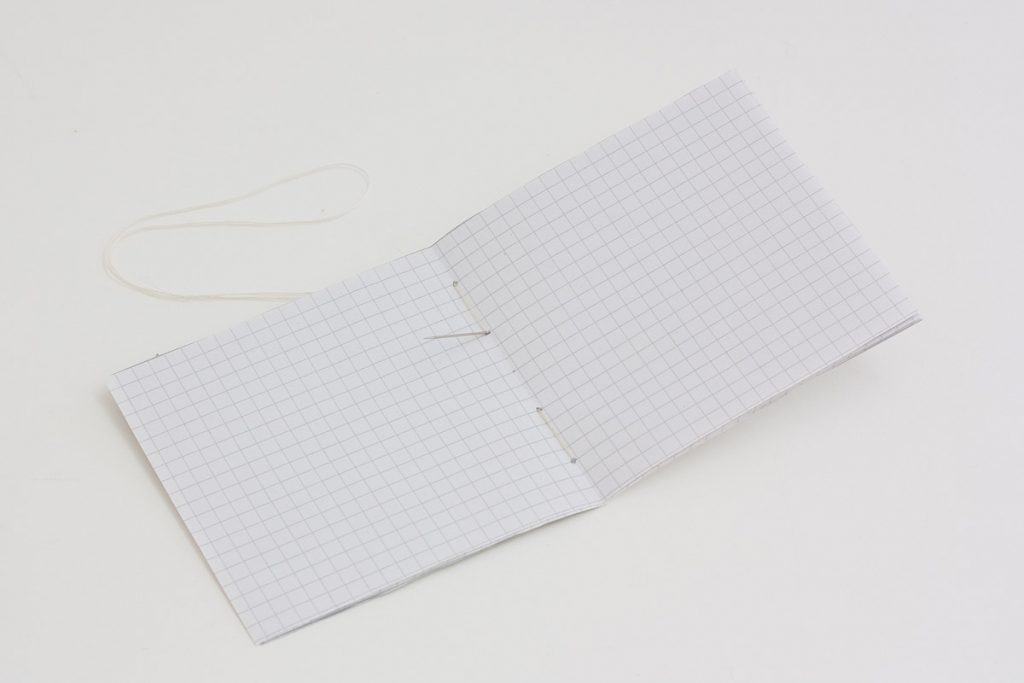
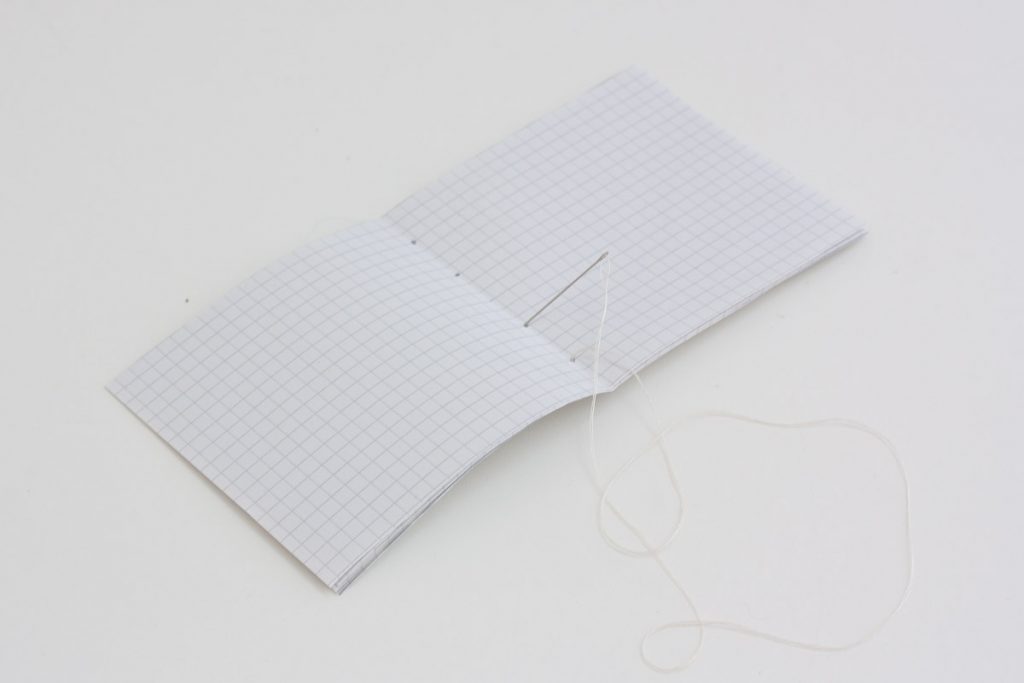
Let’s bind those papers together. Start from the bottom hole and from the outside, so your knot won’t be visible. Go in and out of the holes until you get to the top, then go ahead and go back to the bottom still going in and out. Repeat this once more, pulling firmly this time. Make a knot once you reach the top, again on the outside.
Step 4
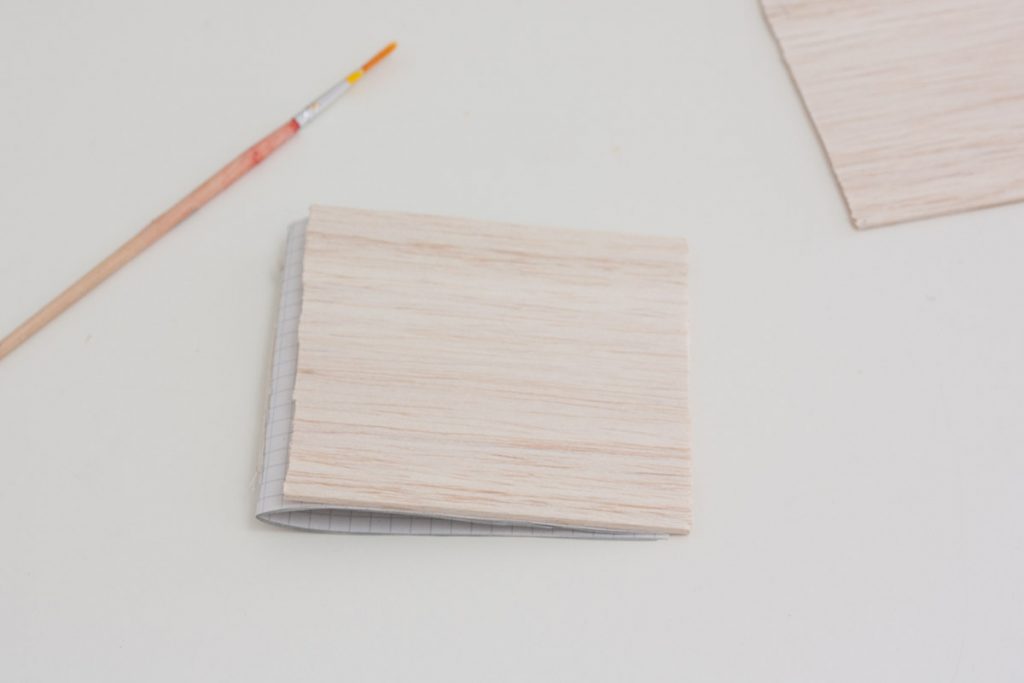
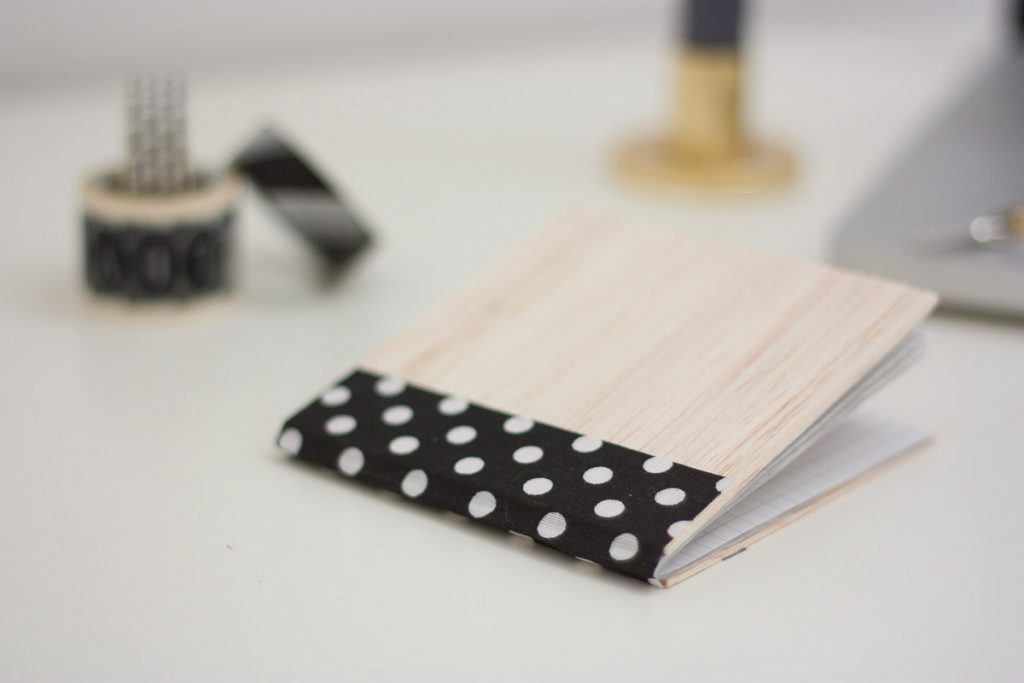
Close your pile of paper and glue on the first and last pages the wooden squares. Make sure they pop out slightly on the right – that’s the open end – whilst the paper will pop out on the left side.
Step 5
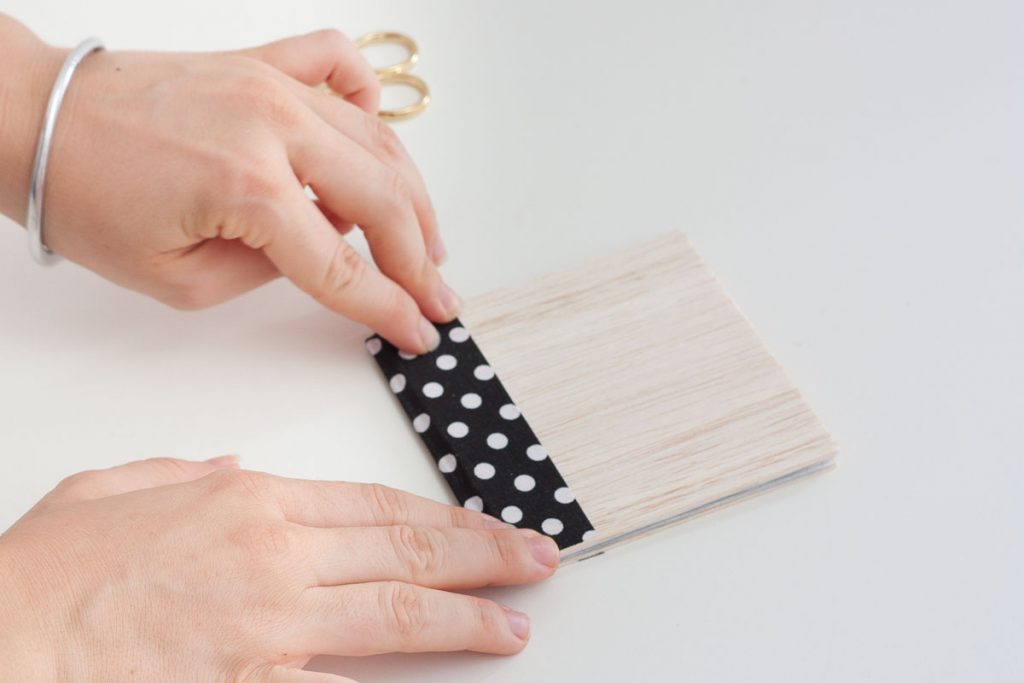
Cut a rectangle of textile that will cover the exposed paper with all the knots on the left and glue it on the side. Make sure it continues all the way to the back. This will help keep things together and is quite cute!

Last Updated on
That’s an interesting way to bind it too. I always wanted to be able to make a notebook with a really nice proper binding, this will definitely more than do in the meantime!
Thanks Alexandra! I think this could be a sort of halfway solution, it’s not a real proper thread binding, which are the strongest (and nicest looking) kind of binds, but still is a fast and chaper solution, as you say. If you’re interested in real hand thread binding, we’ve used it for a photo album and there’s just a step by step guide you can easily follow for your notebook:
http://www.one-o.it/diy-hand-binded-photo-album/
Hope this is useful! Xo, Chiara & Irene
This is so cute and unique! I love it 🙂
Akino | akinokiki.blogspot.ca
Happy you like it Akino 🙂 Xo, Chiara & Irene