
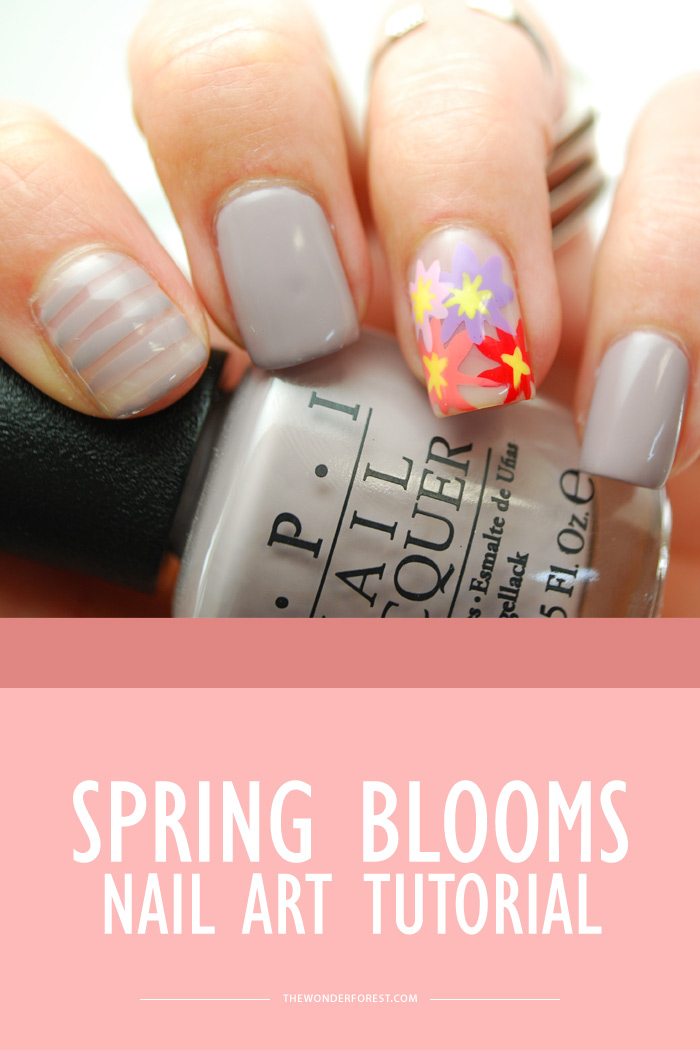
Stripes + flowers = the cutest nails for spring! Pair this nail look with a nautical tee and your favourite skinnies and you’re good for a day out enjoying the fresh spring air.
You Will Need
• Basecoat
• Polish colours and sheer polish
Instructions
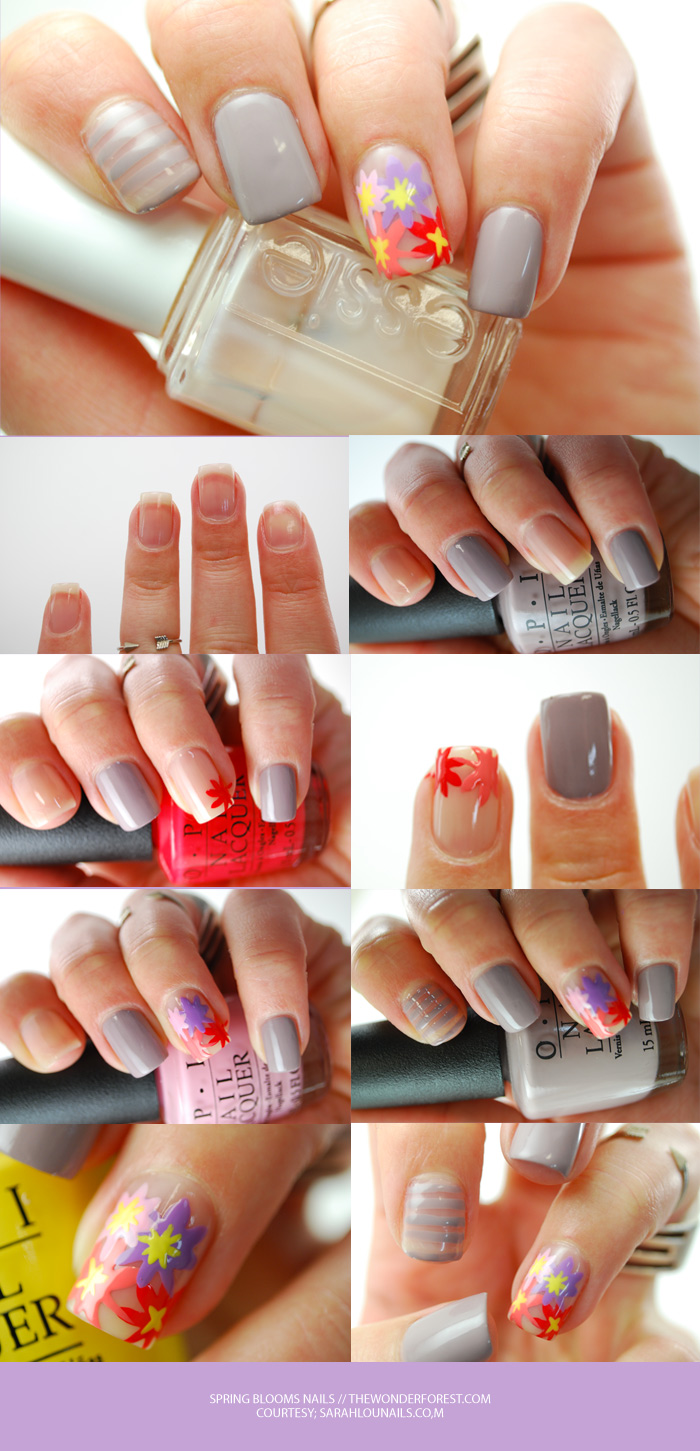
Step 1: Apply base coat
Step 2: Apply 2 coats of grey polish to your pinkie, middle & thumb nail. Apply 2 coats of a sheer nude polish to your ring & index nail.
Step 3: Using a thin striper brush, paint a small red flower on the top left corner of your nail.
Hint: To make a flower, paint two + signs on top of eachother, the second one turned at a 45 degree angle. Essentially to make an asterisk.
Step 4: Repeat step 3 with a coral polish on the top right corner of your nail, it’s ok if the flowers overlap.
Step 5: Repeat step 3 with a light purple to make a flower on the bottom left of your nail, and a light pink on the bottom right of your nail.
Step 6: Using a thin striper brush, make some grey horizontal stripes across your index finger nail, over the sheer nude.
Step 7: Using a thin striper brush, make smaller flower shapes with a yellow polish in the center of all the flowers you painted.
Step 8: Apply top coat!
Colours Used
OPI: Taupe-Less Beach
OPI: Suzi Shops & Island Hops
OPI: Do You Lilac It?
OPI: Aloha From OPI
OPI: Green-wich Village
Essie: Sugar Daddy
Essie: Tart Deco
Seche Vite: Dry Fast Top Coat
Last Updated on
This nail tutorial looks great. I think light blue design will be looking good too. Blue color is very pretty and not so bright for the date. I can advice http://nailartstyle.com/top-50-light-blue-nail-designs because there are a lot of different modern designs and tutorials.