The process of transferring your hand drawn pieces to Photoshop is actually quite easy. When I create my phone cases and other artwork, I use this same process. Importing your hand drawn work to Photoshop means that you can use it in a variety of ways, for example as a blog header, on business cards, or wherever else you see fit. Here’s how it’s done:
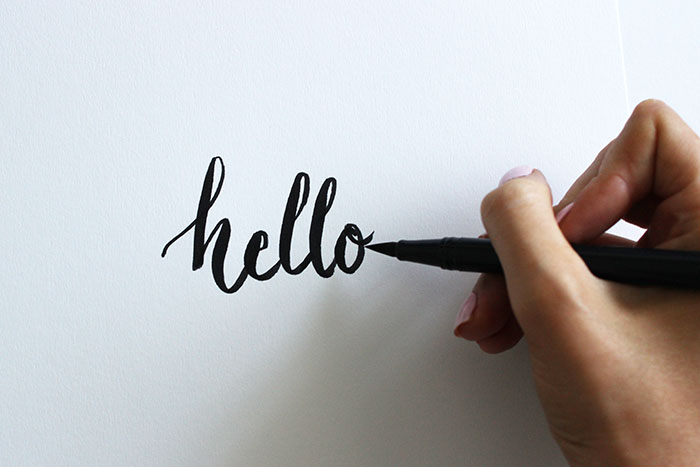
1. First create your artwork. I’ve done a simple bit of hand lettering for this demonstration. It works best if you create your art or lettering on a simple piece of white paper.
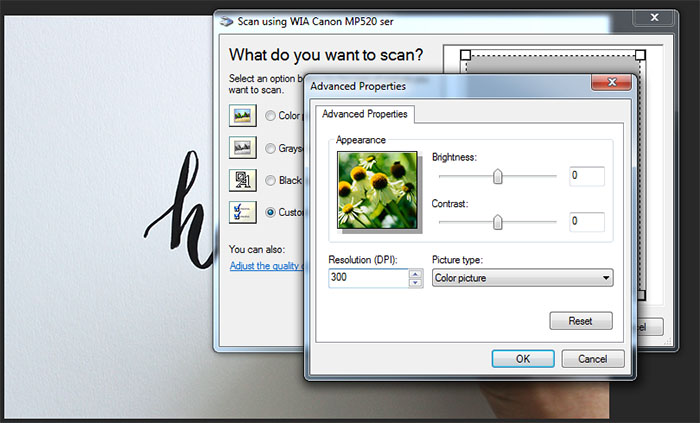
2. Scan your image. You will need a scanner for this step, which most printers come with nowadays, so you should be familiar with the scanning process. In your scanner’s settings (before you scan the drawing) adjust the DPI setting to 300 for best results. Note that your scanner interface may look different than mine depending on your scanner, but the settings should have similar options.
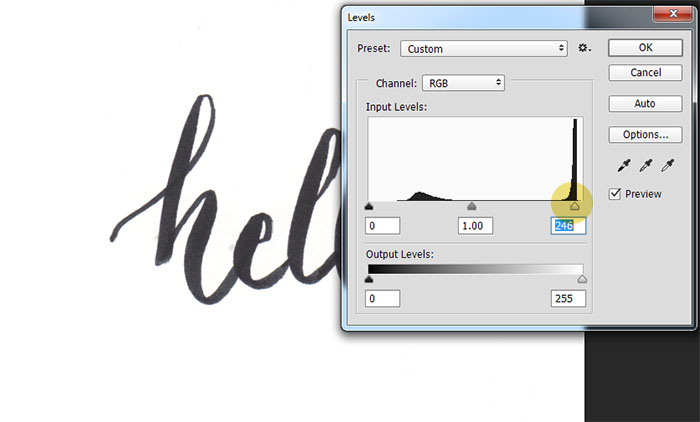
3. Open the scan in Photoshop. Now we will increase the brightness of the white background. This is essential in allowing you to totally remove the white background, which we will do in step 5. Open up the Levels window by going to Image > Adjustments > Levels in the top menu. You’ll want to drag the slider on the right over to where the black “graph” begins to spike, like so:
You should notice the white become brighter. As you can see in the image above, the white background of my scan blends in seamlessly with the white background of this post, meaning it is now a true white.
4. Clean up any imperfections. You can grab the Eraser tool now and clean up any spots or errors digitally.
5. Removing the white background. If you want to use your image in a design where you are layering elements, usually you will want to make it a stand alone graphic. Sometimes a white background can get in the way, especially if you are not going to place the image itself on a white background in your design. This will also allow you to apply different colours or effects to the image (in my case, just the lettering).
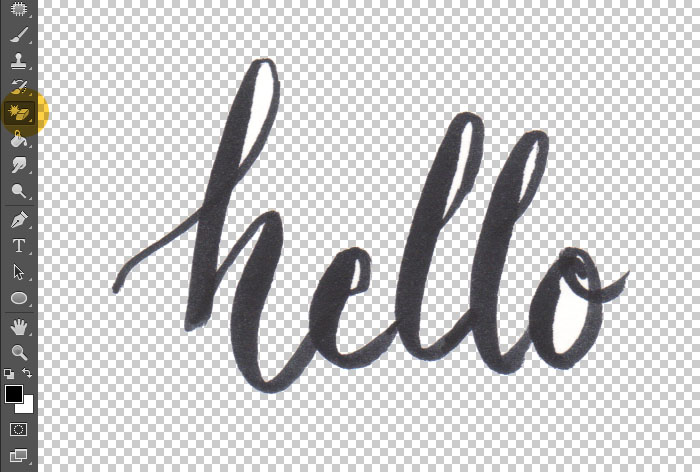
There are a couple of ways to do this. First, you can try using the Magic Wand tool and selecting each piece of the image separately while holding Shift. You can also use the Magic Eraser tool and click on the white background to instantly remove it like so:
You will also need to click on any additional white areas (like the inside of the loops in my lettering) to remove them. This tool tends to work well for basic colour removal around an image, however you may feel as though you want to keep some of the original texture of your drawing. When I work in watercolour, it’s important to me to keep that watercolour texture and transparency of the elements I draw. For that, I wanted something to be able to remove ALL traces of white within the actual image as well, and not just around it like the eraser tool effect.
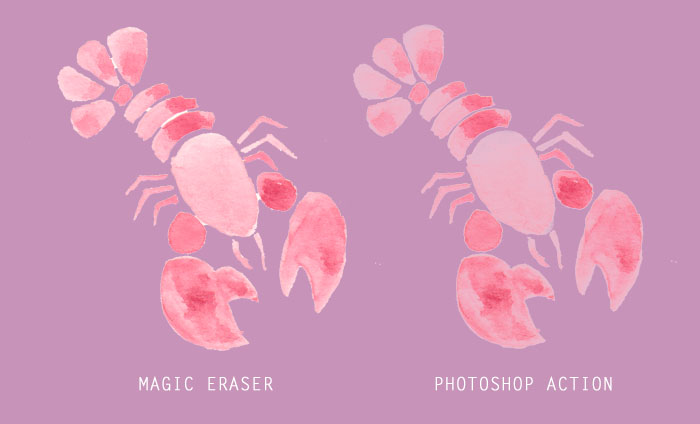
OPTIONAL: For a more professional look, I developed my own Photoshop Action that instantly removes all traces of white from both around and within an image, allowing parts of my image to remain transparent while still being able to apply different colours or effects to it without making it totally solid. If this is something that interests you, you can download that action right here.
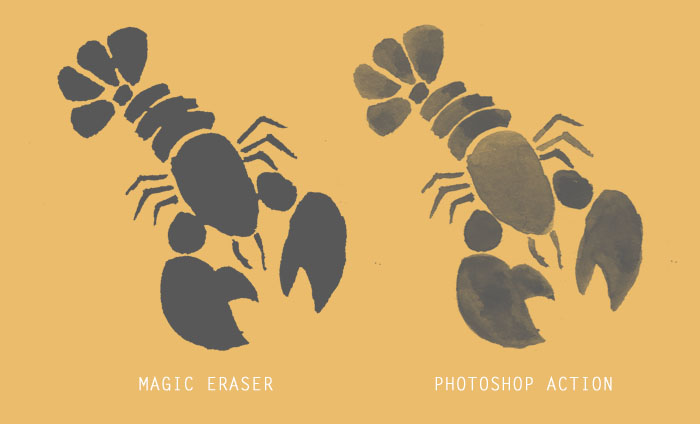
Here is an example of using the Magic Eraser vs. the Action below:
And here it is with a Color Overlay applied:
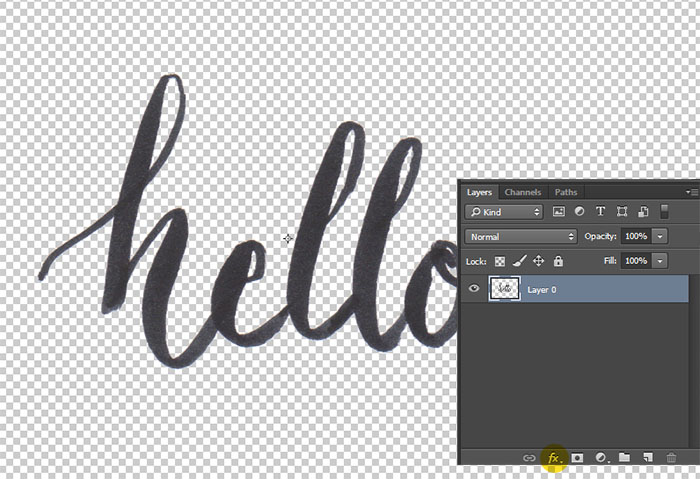
6. Adding colour or effects to your image. A single colour image without transparencies can benefit from using simple Color Overlays, Pattern Overlays, or Gradient Overlays easily. With your image layer selected, choose the “FX” icon from the bottom of your Layers palette:
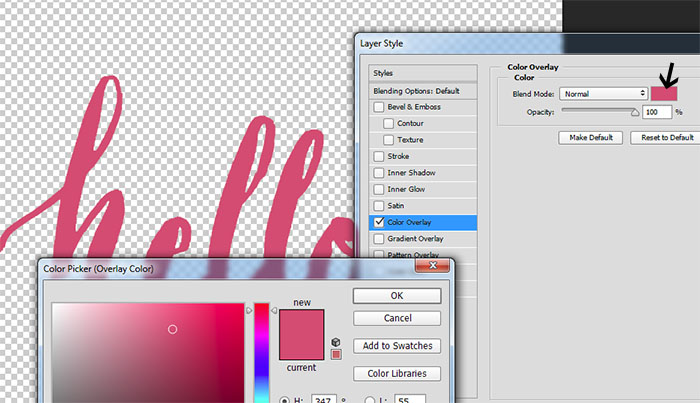
You can then choose Color Overlay and select a colour:
7. Your image is now ready to be used in your design! If you’d like to save this as it is with a transparent background, just make sure to save it as a .PNG with transparency.
I hope this tutorial was helpful. If it was, please consider sharing it!
Last Updated on

