I mentioned a little while ago that I would throw together a quick little tutorial about how to get rid of blemishes in Photoshop. This technique is SO easy and can be used for tons of stuff… removing objects from photos, fixing imperfections, etc.
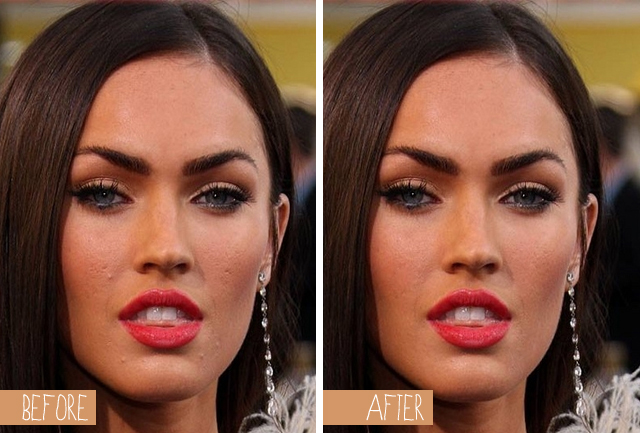
For this tutorial, I grabbed a photo online of Megan Fox with pimples. Her mouth really started to bother me half way through but I didn’t feel like choosing someone else and redoing everything. We’re going to help her out though, at least in one area. We’re going to magically erase her zits and take her from this, to this:
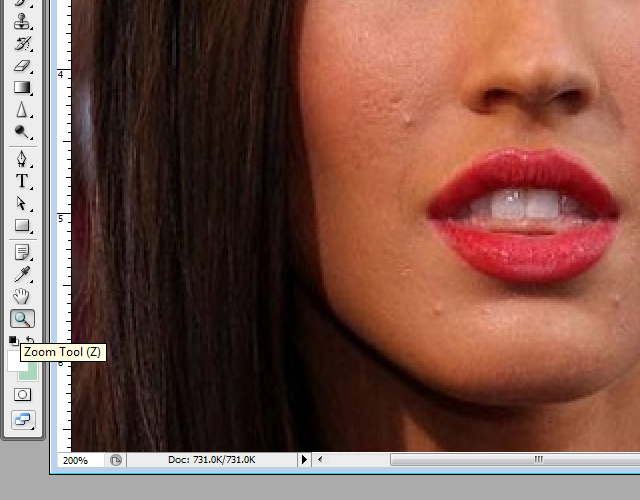
1. Open up Photoshop and select the photo you want to edit. Zoom in on the problem area with the zoom tool.
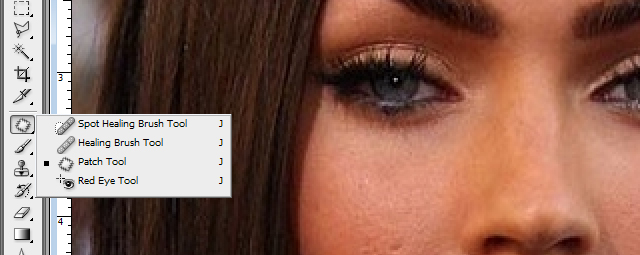
2. We’re going to be using the “Patch Tool” for this. With small issues, you could just use the Clone tool, but I personally like this method better because the Clone tool doesn’t tend to blend well. If you click and hold down the icon above the paint brush, you’ll be able to select the Patch Tool.
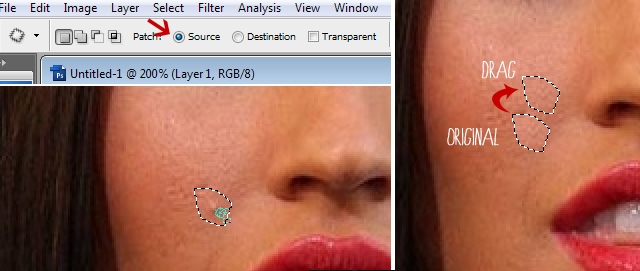
3. After selecting the Patch Tool, look at the top menu under the navigation bar. This little radio button should be selected as Source.
With your Patch Tool ready, click and hold to draw a circle around the blemish or problem area. Let go when done. Now, click and drag the center of the area you just circled. You’re going to want to drag it to a blemish free spot. As you do this, you can see that the image inside of your circled area changes to match the area you are dragging it to.
Press CTRL + D to deselect the area. You’ll see that Photoshop automatically blends the area together. Here is our “after”:
4. Now let’s fix the rest of her face! Doing the same thing as above, we can turn this:
Into this!:
Pretty easy, right? Now I bet you feel like going back and fixing up some of your photos! Hope you enjoyed this one. Next time, I’ll teach you how to smooth out the skin entirely… and no, it doesn’t happen with the “blur” tool. (I see all of you blur tool culprits and will change your ways!)
Last Updated on


